Attention! Images are for informational purposes only and may differ from what appears on your screen.
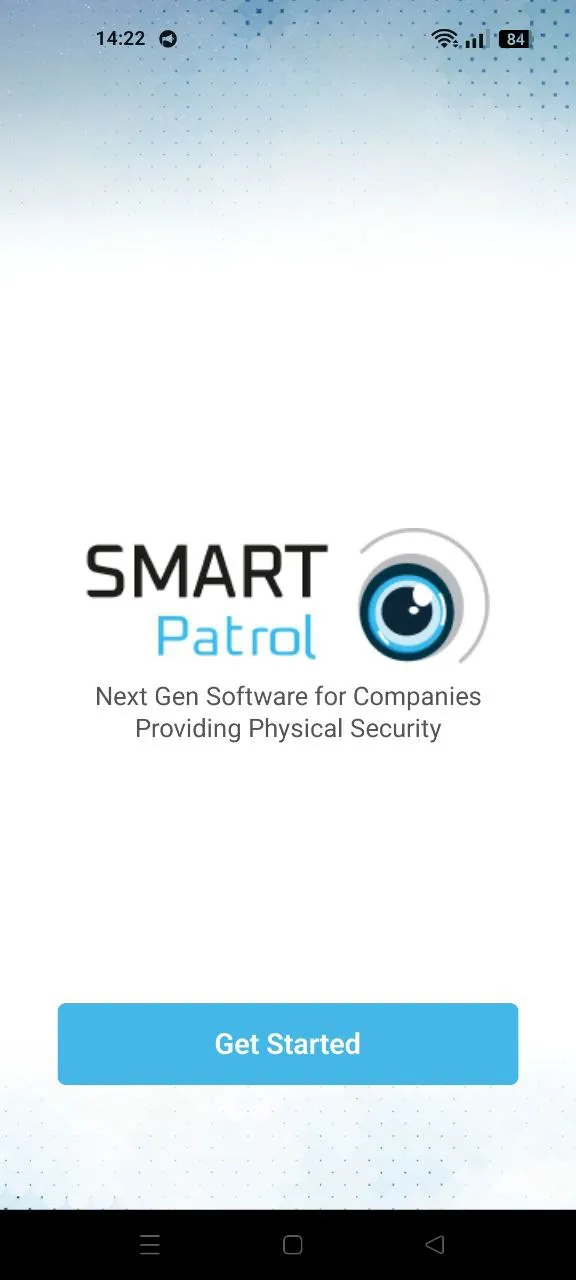
1. Launch the App
- After launching the SmartPatrol app on your device, wait for it to load and press the "Get Started" button to proceed to the login screen (Image 1).
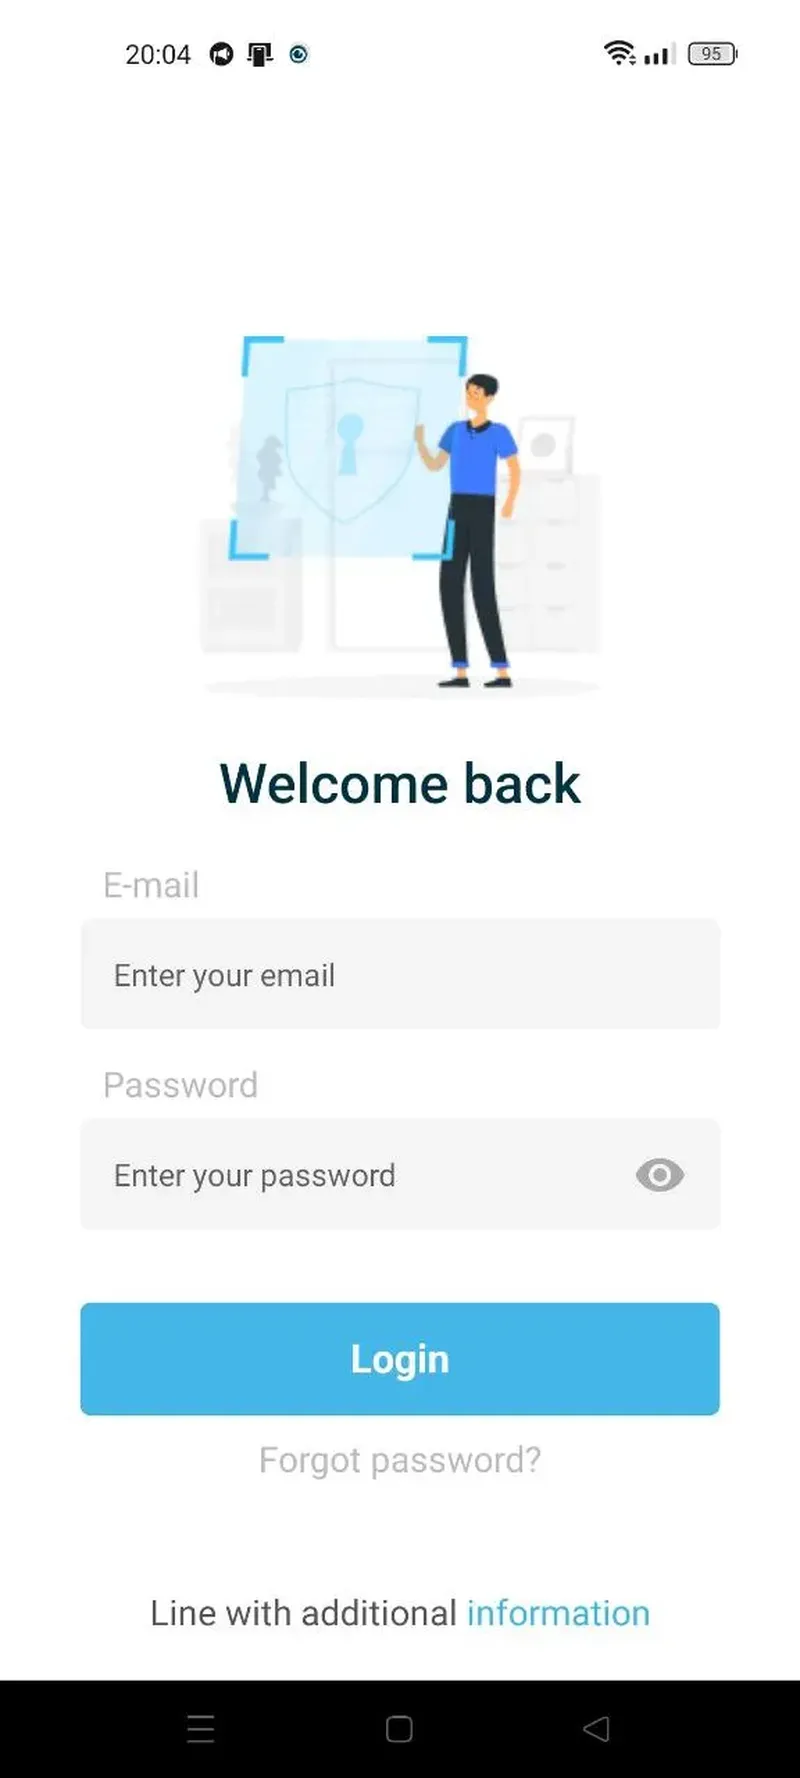
2. Log In
- Enter your personal login (email) and password in the corresponding fields (Image 2).
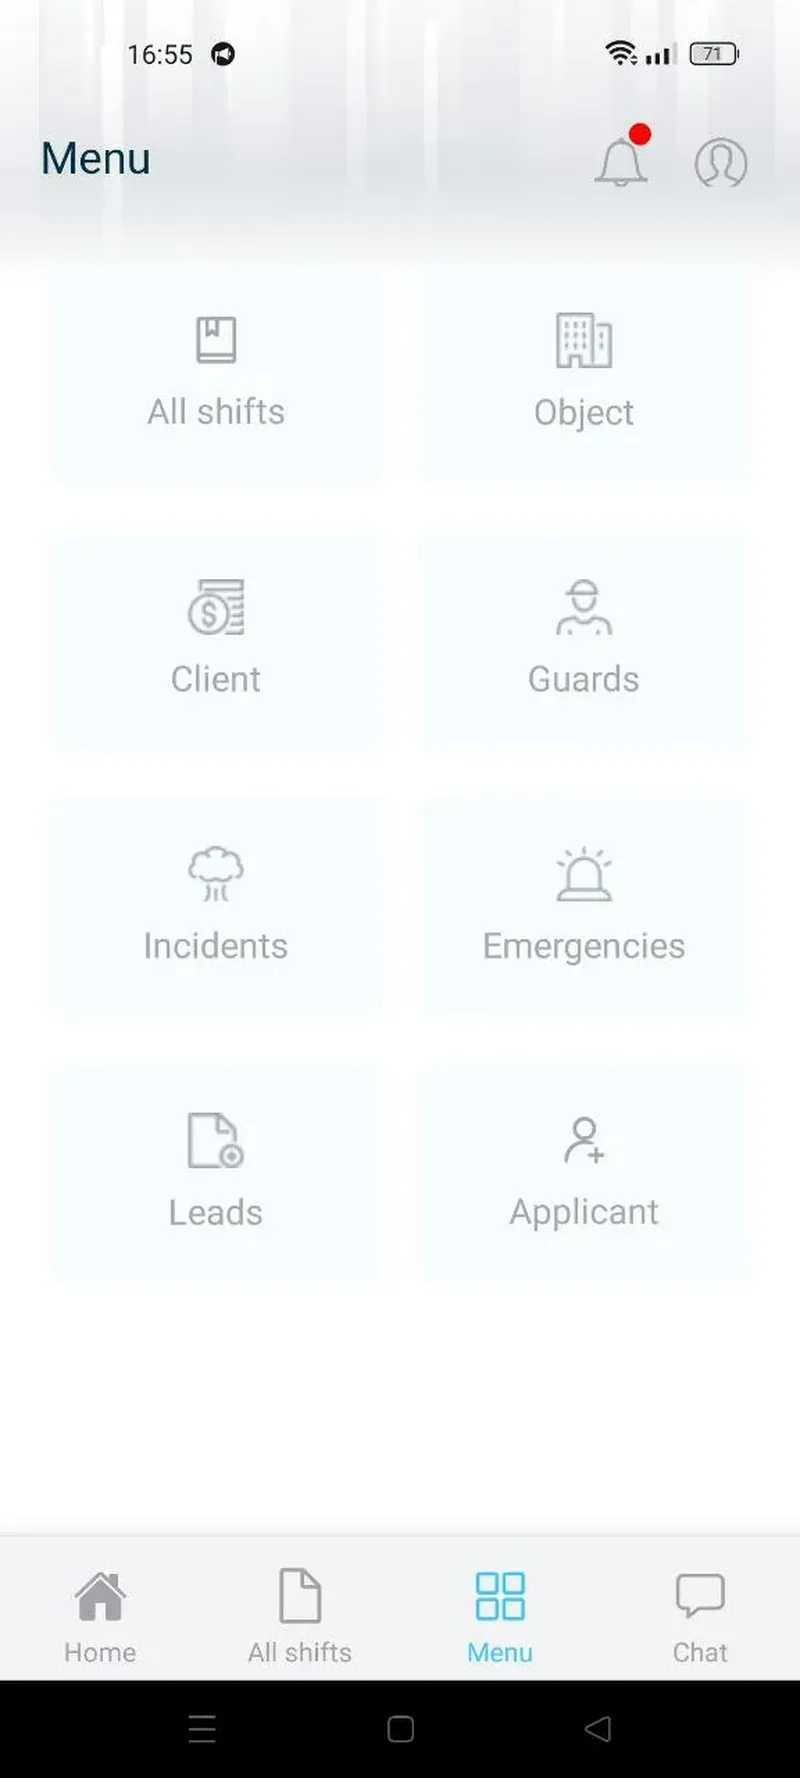
3. Navigate to the Leads Section
- After logging in, you will be directed to the main dashboard. Click on the "Leads" option in the left-hand sidebar to access the leads management interface (Image 3).
4. Creating a Section for Leads
- Sections help organize leads by status or category on the web interface.
- In the Leads section, click the "Add Section" button (Image 4).
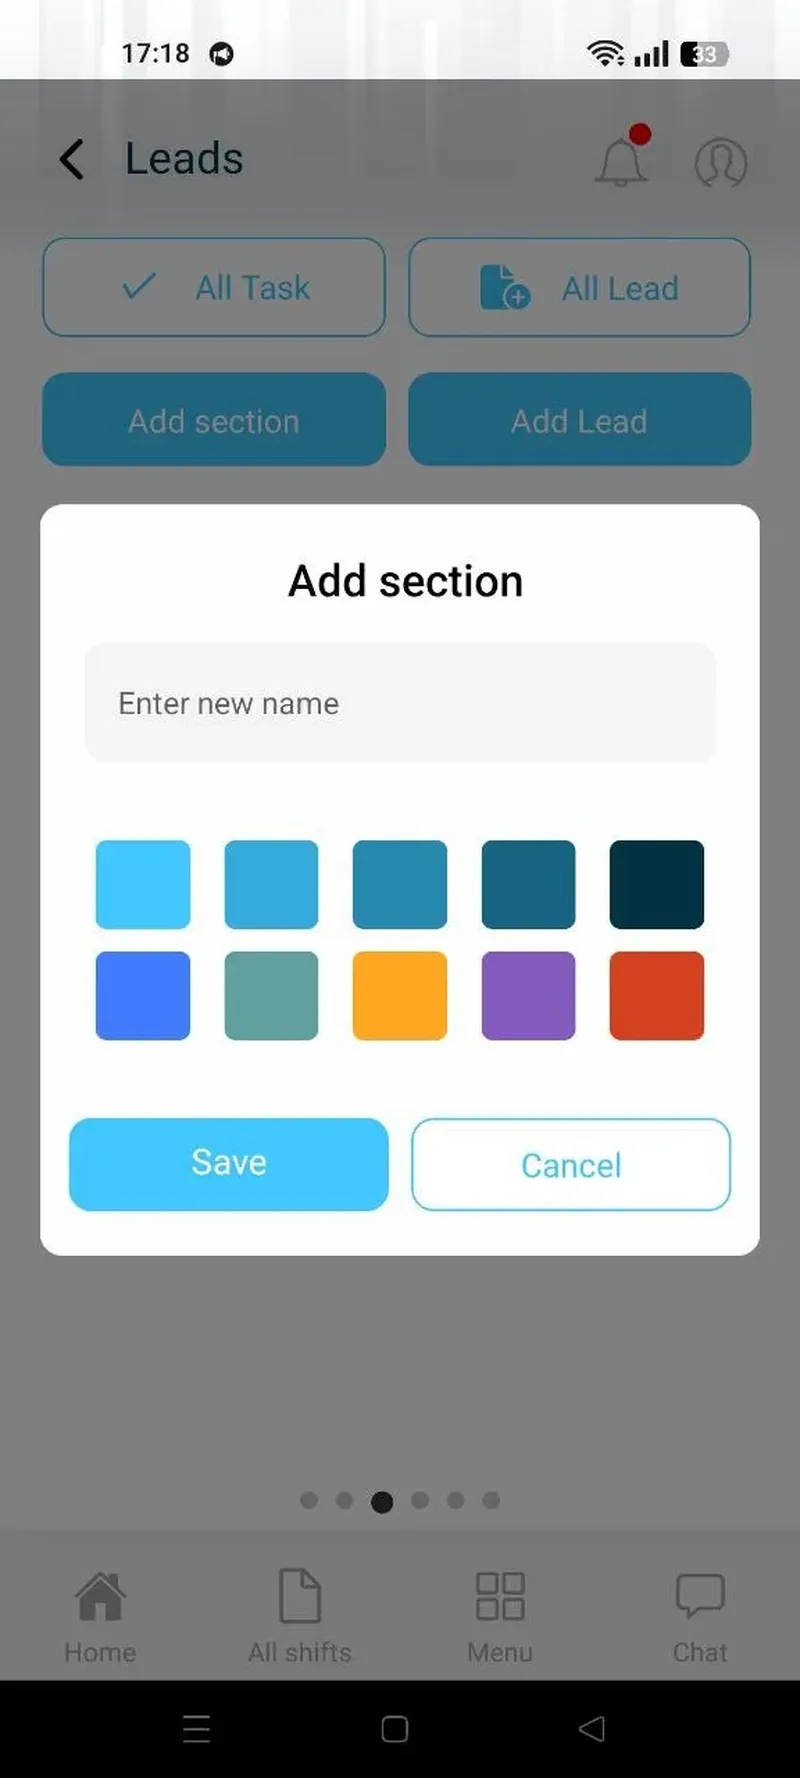
- Click "Add New Section" in the sections management panel.
- Enter the section title and select a color.
- Click "Save" to create the section or "Cancel" to discard.
Notes: Sections like "Created" or "In Progress" help group leads by stages or types. The process is consistent across the web interface.
5. Creating a Lead
- A lead represents a potential client or opportunity. Follow these steps to create one:
- Click the "Add Lead" button at the top of the Leads page (Image 5).
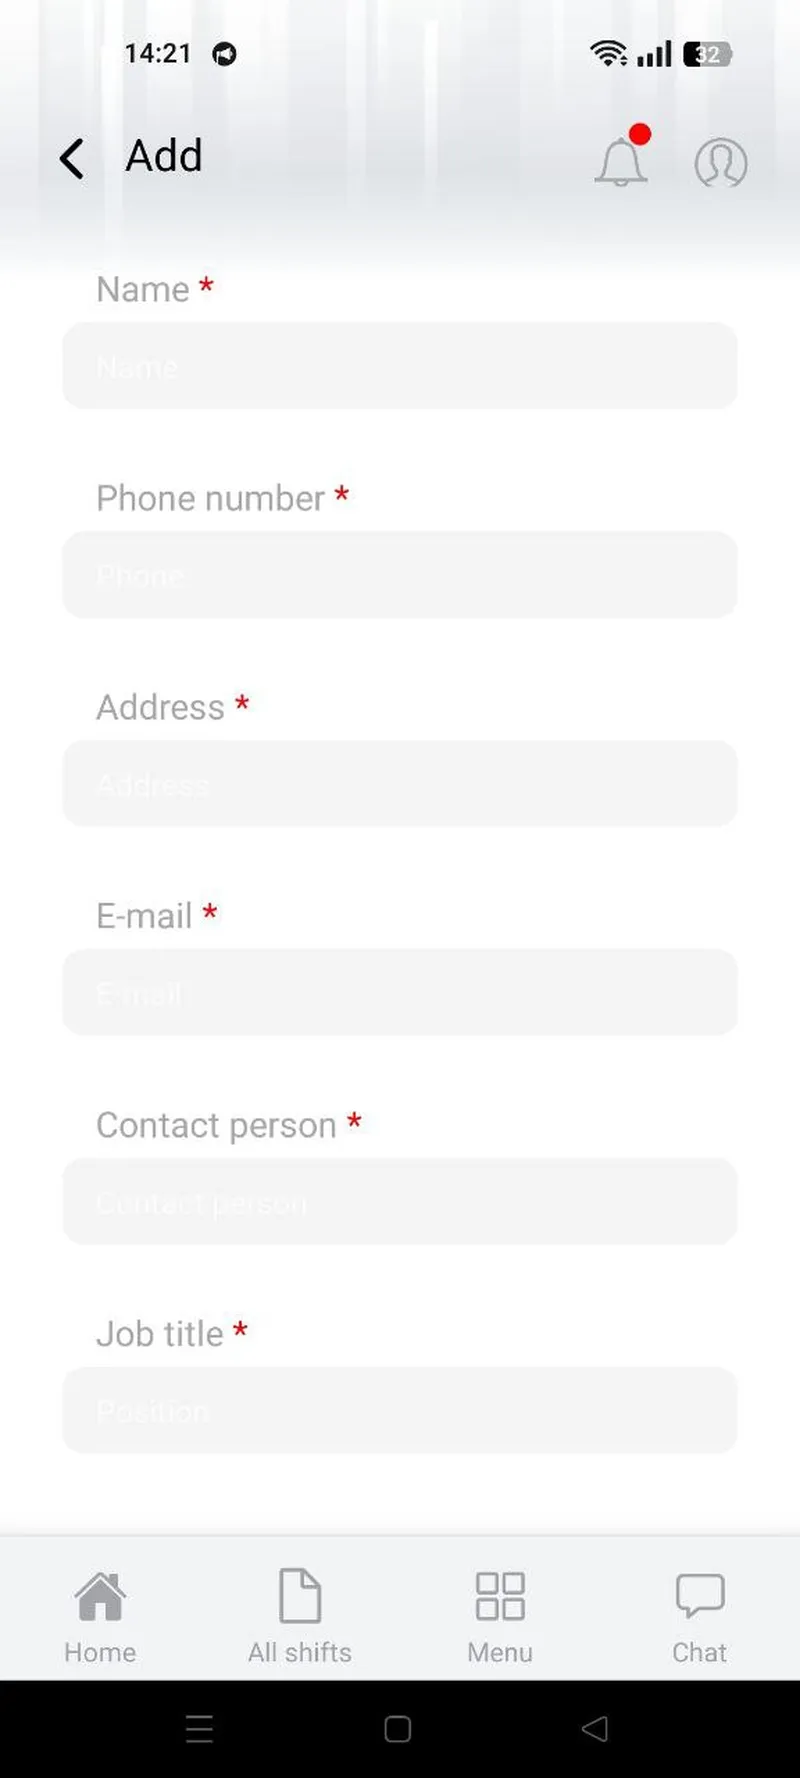
- Fill out the form with the required fields (exact fields may vary):
a) Lead Name: Enter the name of the lead.
b) Contact Information: Provide email, phone number, address, contact person, job title and status (e.g. Section for Leads)
- Click "Save" to add the lead or "Cancel" to discard.
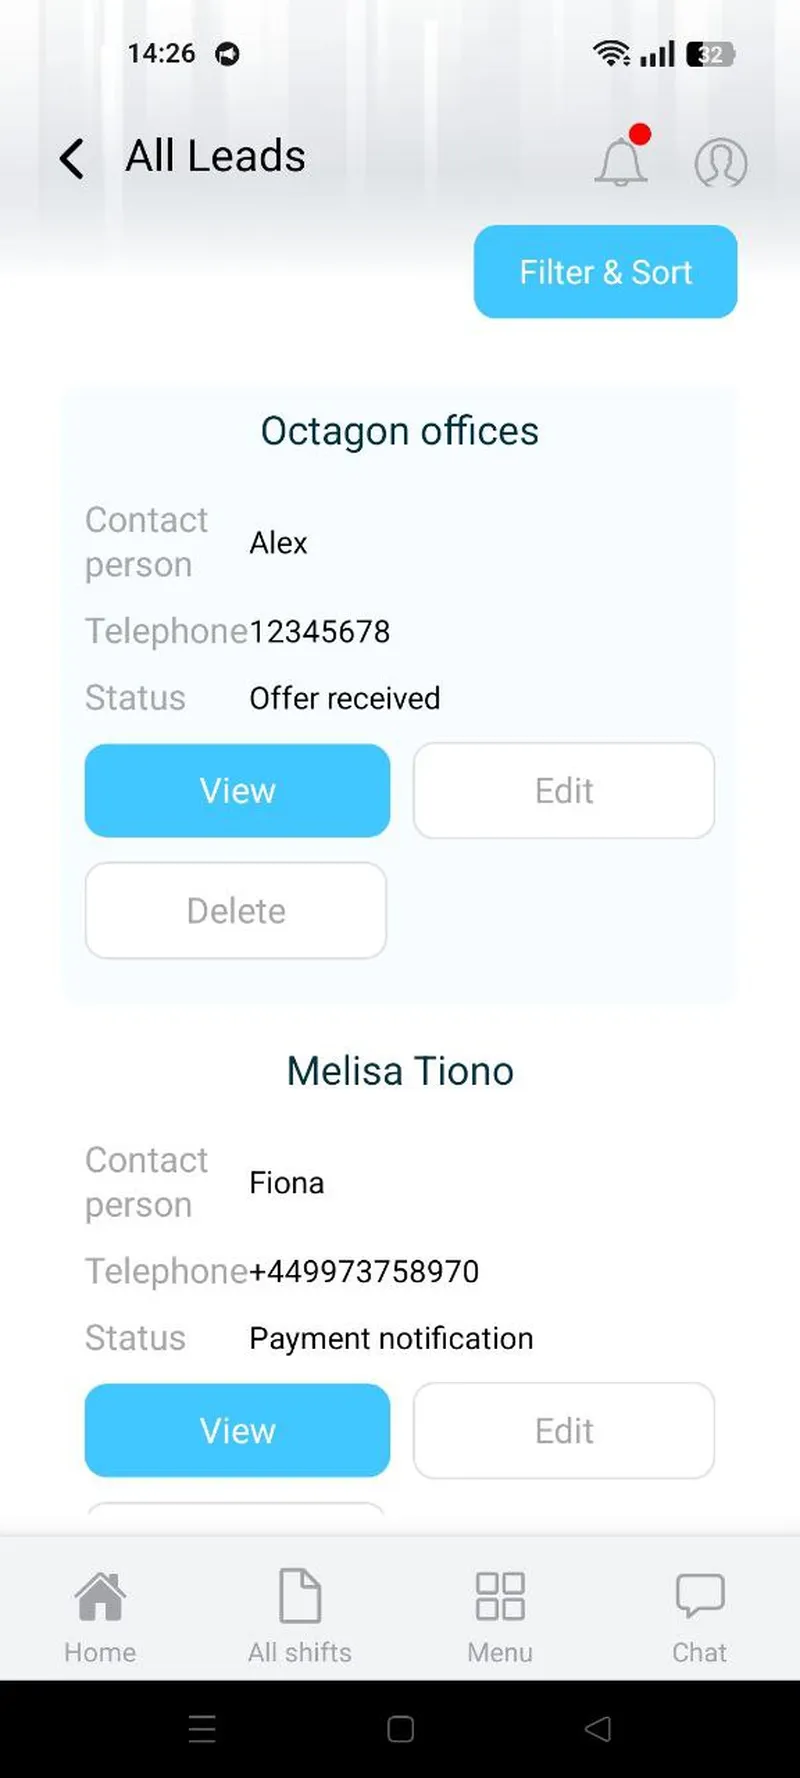
Notes: To view or delete leads, use the "View All Leads" link (Image 6) to access the list of all leads. The creation process is consistent, even if the form fields differ slightly.
6. Creating a Task Within a Lead
- Tasks allow you to track actions or reminders for a specific lead.
- From the Leads page, click on the desired lead to open its details (Image 7).
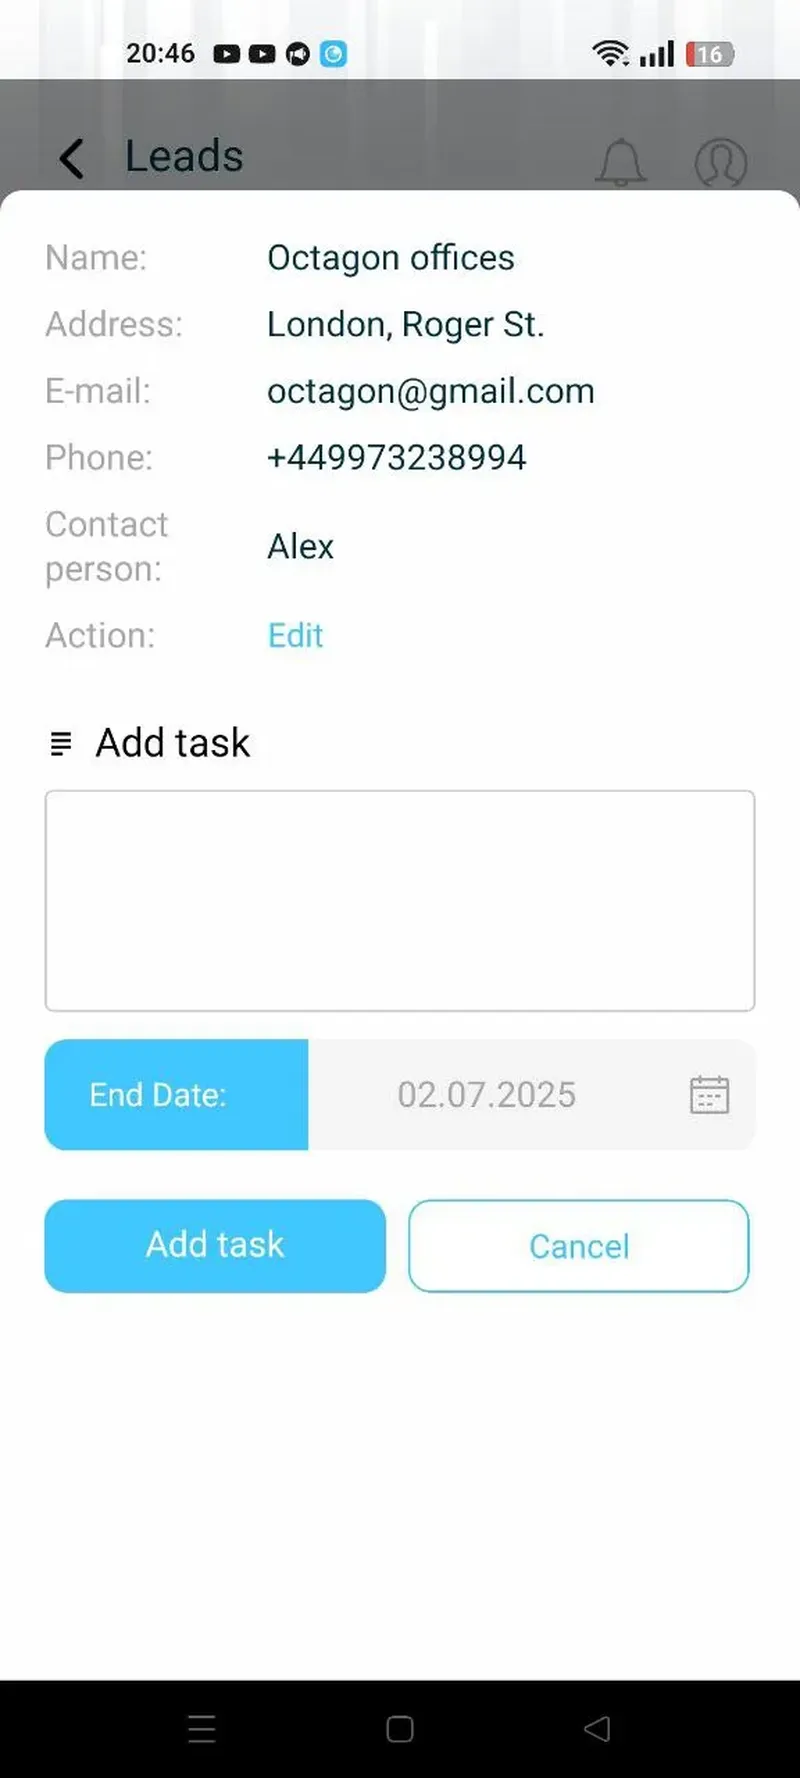
- Click the "Add Task" button within the lead’s details.
- Enter the task description and set the due date using the calendar option.
- Click "Add Task" to save or "Cancel" to discard.
- Once completed, click "Mark as Complete" to change the task status to "Closed".
- To view all tasks, click "All Tasks" in the sidebar (Image 8).
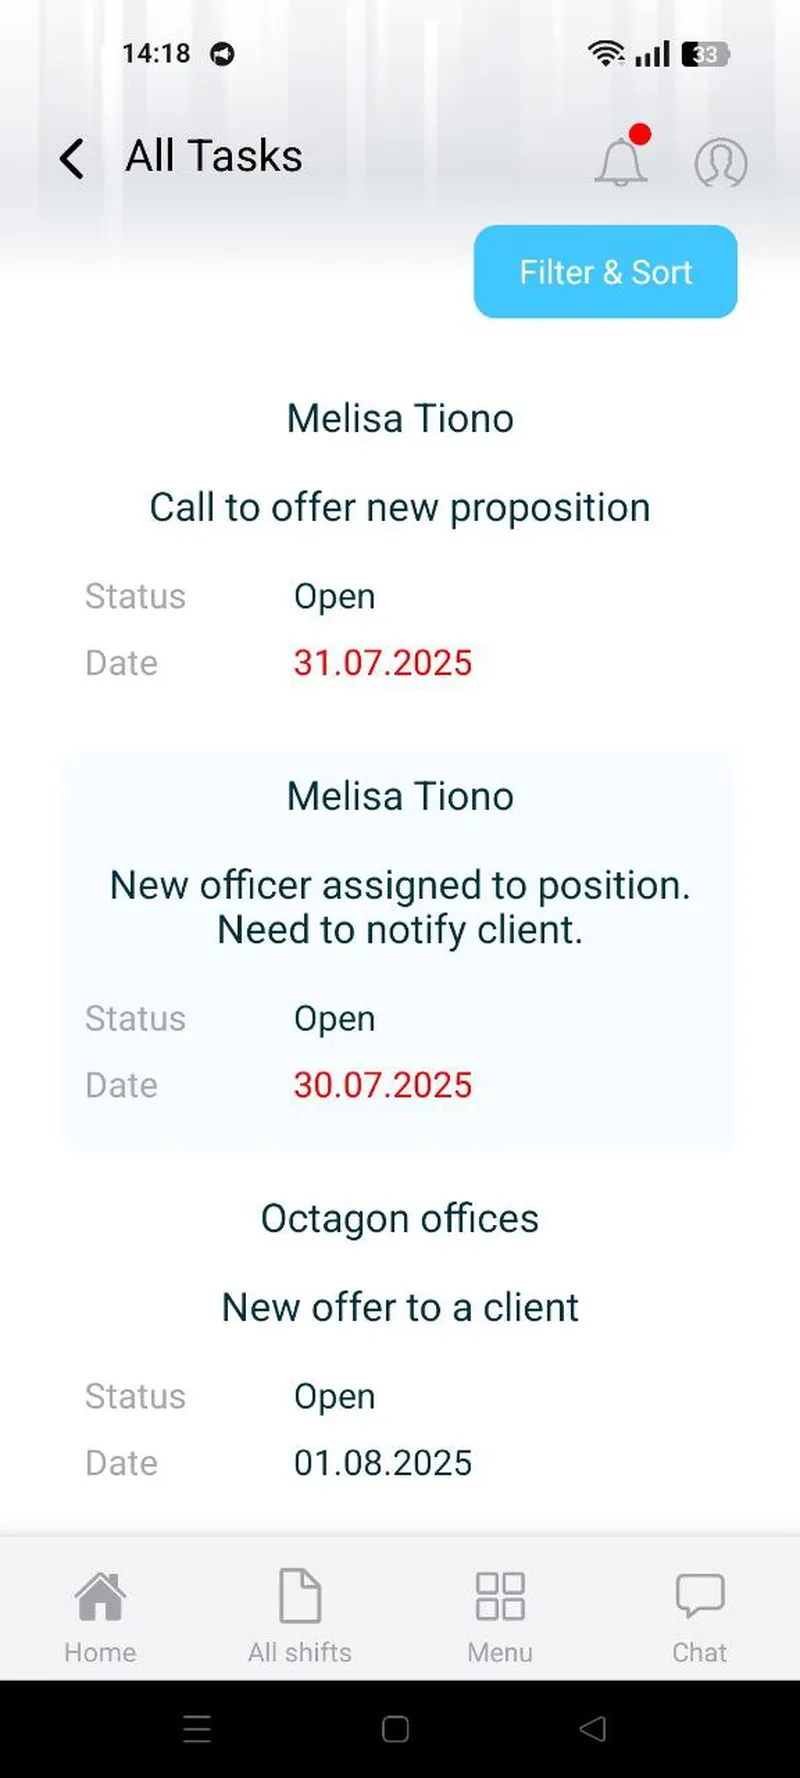
Notes: Tasks help monitor progress and ensure timely actions. Ensure the due date is set correctly to avoid missing deadlines.
Additional Tips
- Updates: Regularly check for browser or system updates to ensure compatibility.
- Internet Connection: A stable connection is required for data synchronization.
- Interface Variations: The layout may differ slightly between browsers, but functionality remains consistent.
