Attention! Images are for informational purposes only and may differ from what appears on your screen.
Follow these steps to add a new facility using the Smart Patrol web platform:
1. Access the Website
- Open your browser and navigate to https://smartpatrolapp.com.
2. Log In or Create an Account
- Log in to your existing account using your email and password.
- If you don’t have an account, click "Create Account," fill in the required details (e.g., email, password, name), and complete the registration process.
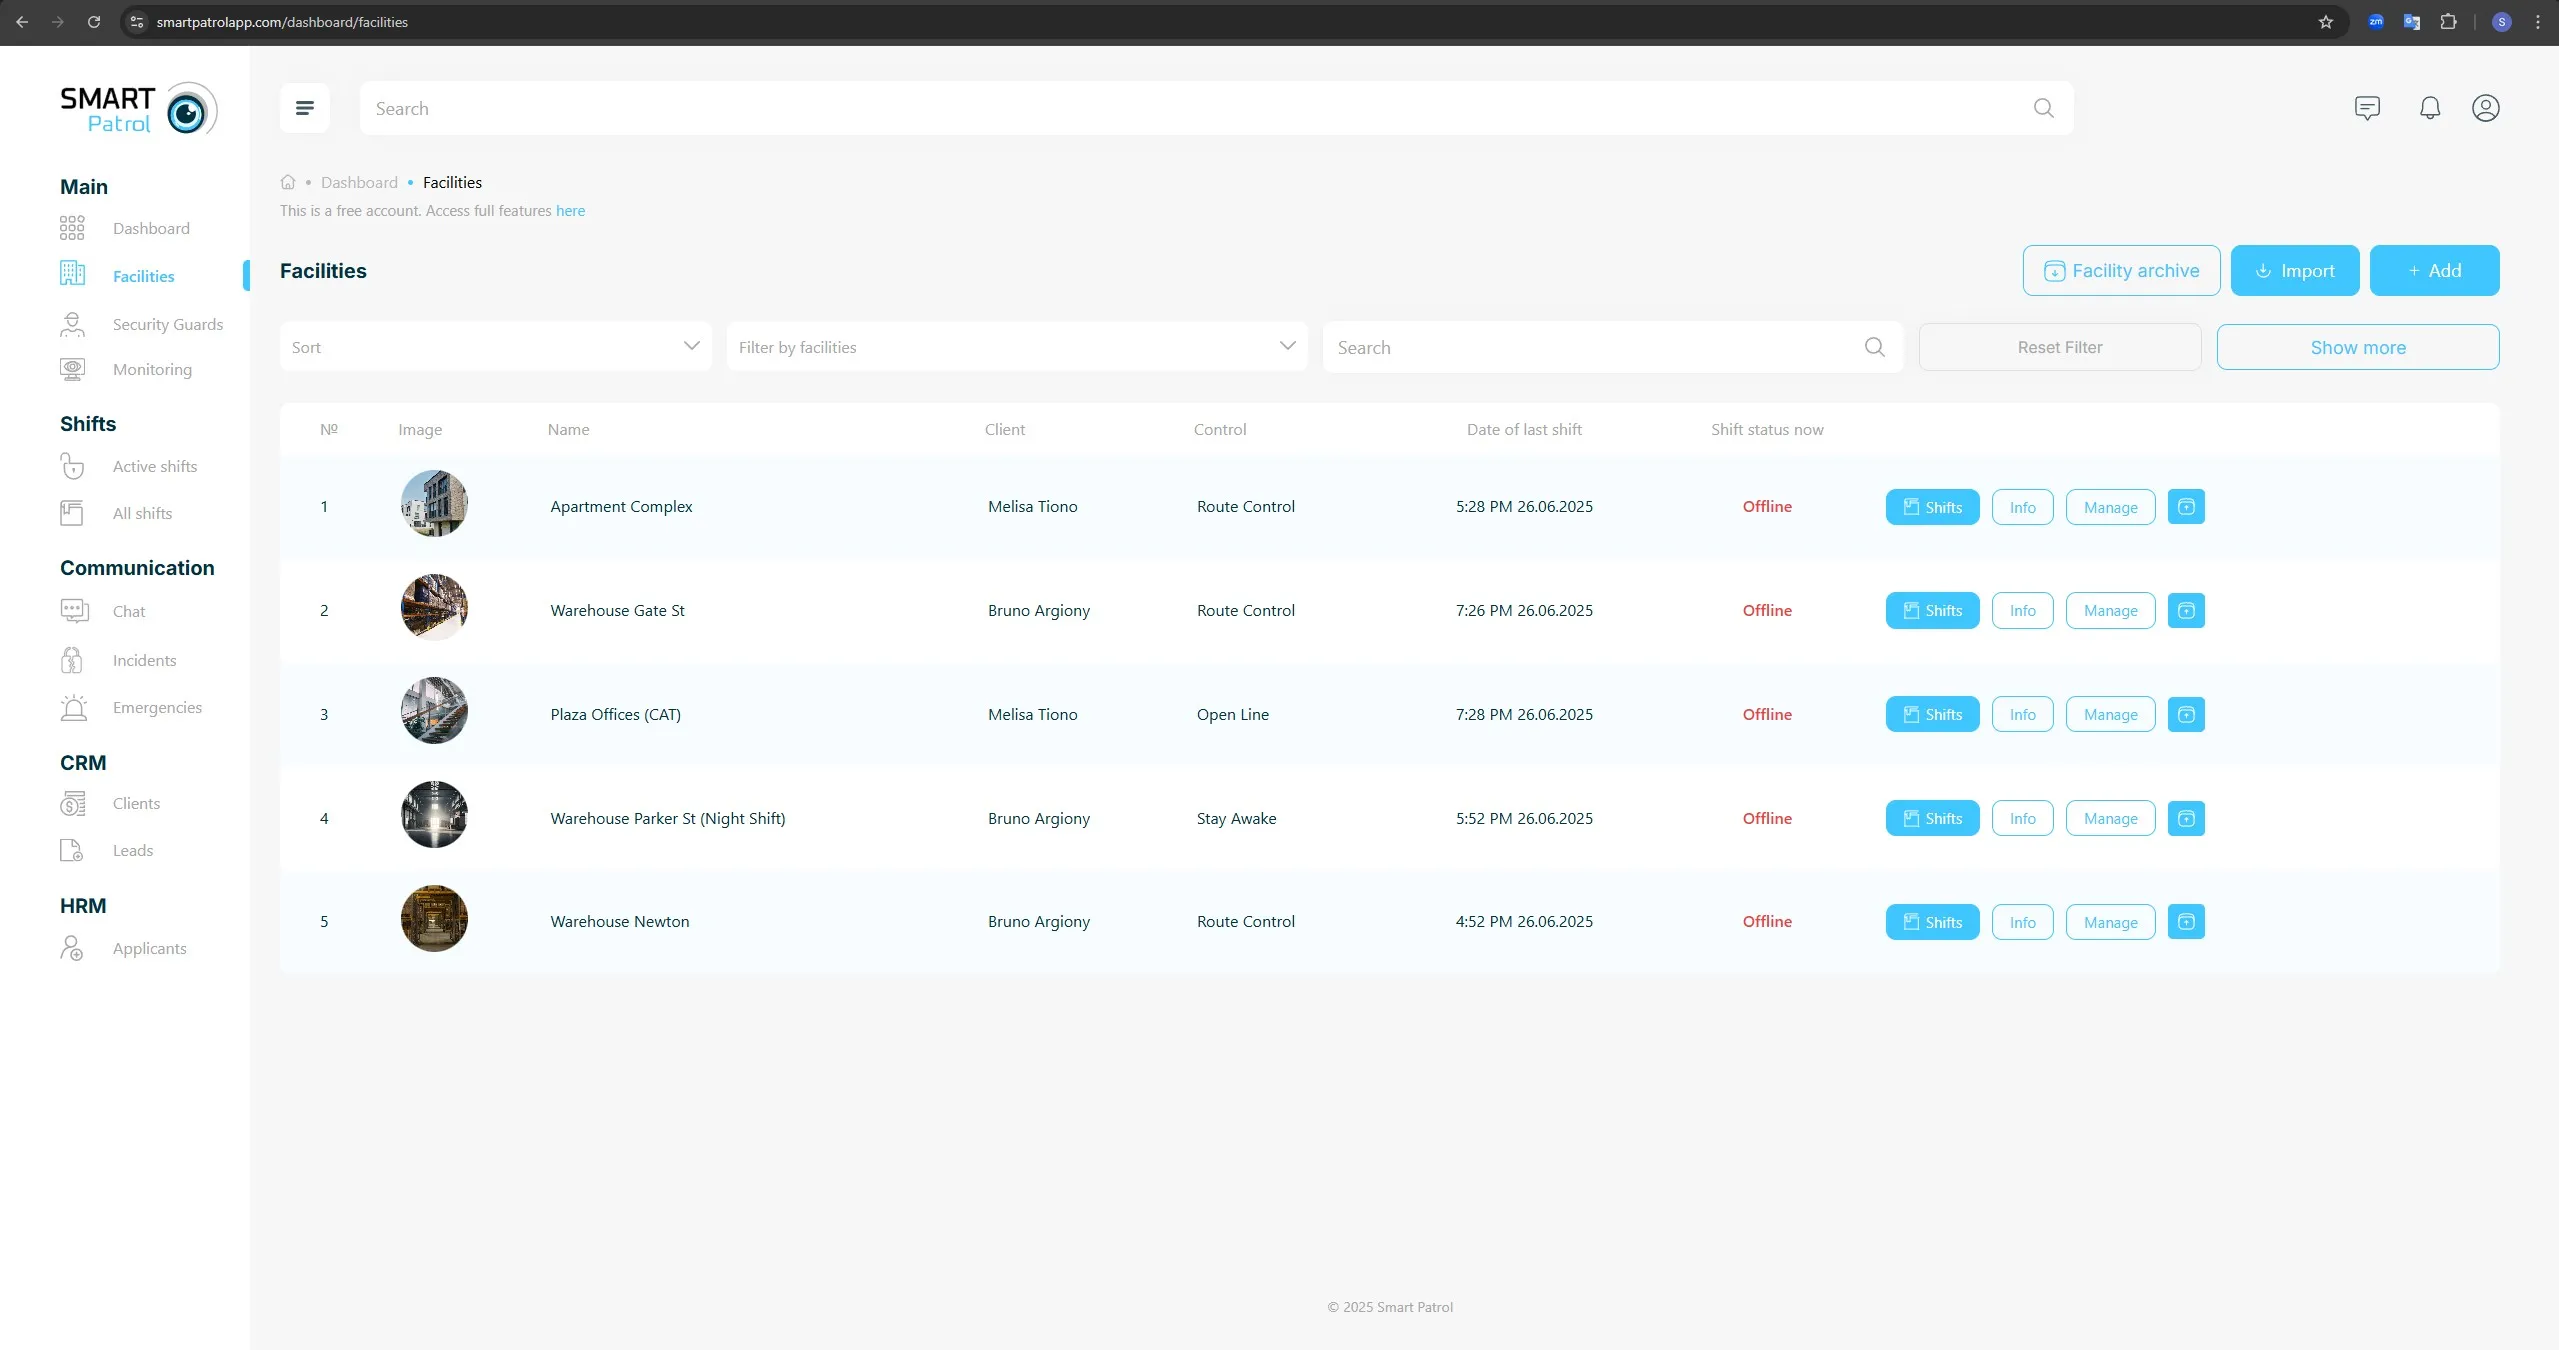
3. Navigate to Facilities
- After logging in, find the left-hand menu on the dashboard.
- Select "Facilities" to view the list of added facilities (Image 1).
4. Press “+Add” to Create a New Facility
- Click the “+Add” button to start adding a new facility.
- Alternatively, click “Import” to upload a .csv file containing facility data.
5. Fill in the Facility Details
You will be directed to the "Add a New Facility" form (Image 2). Complete the following fields:
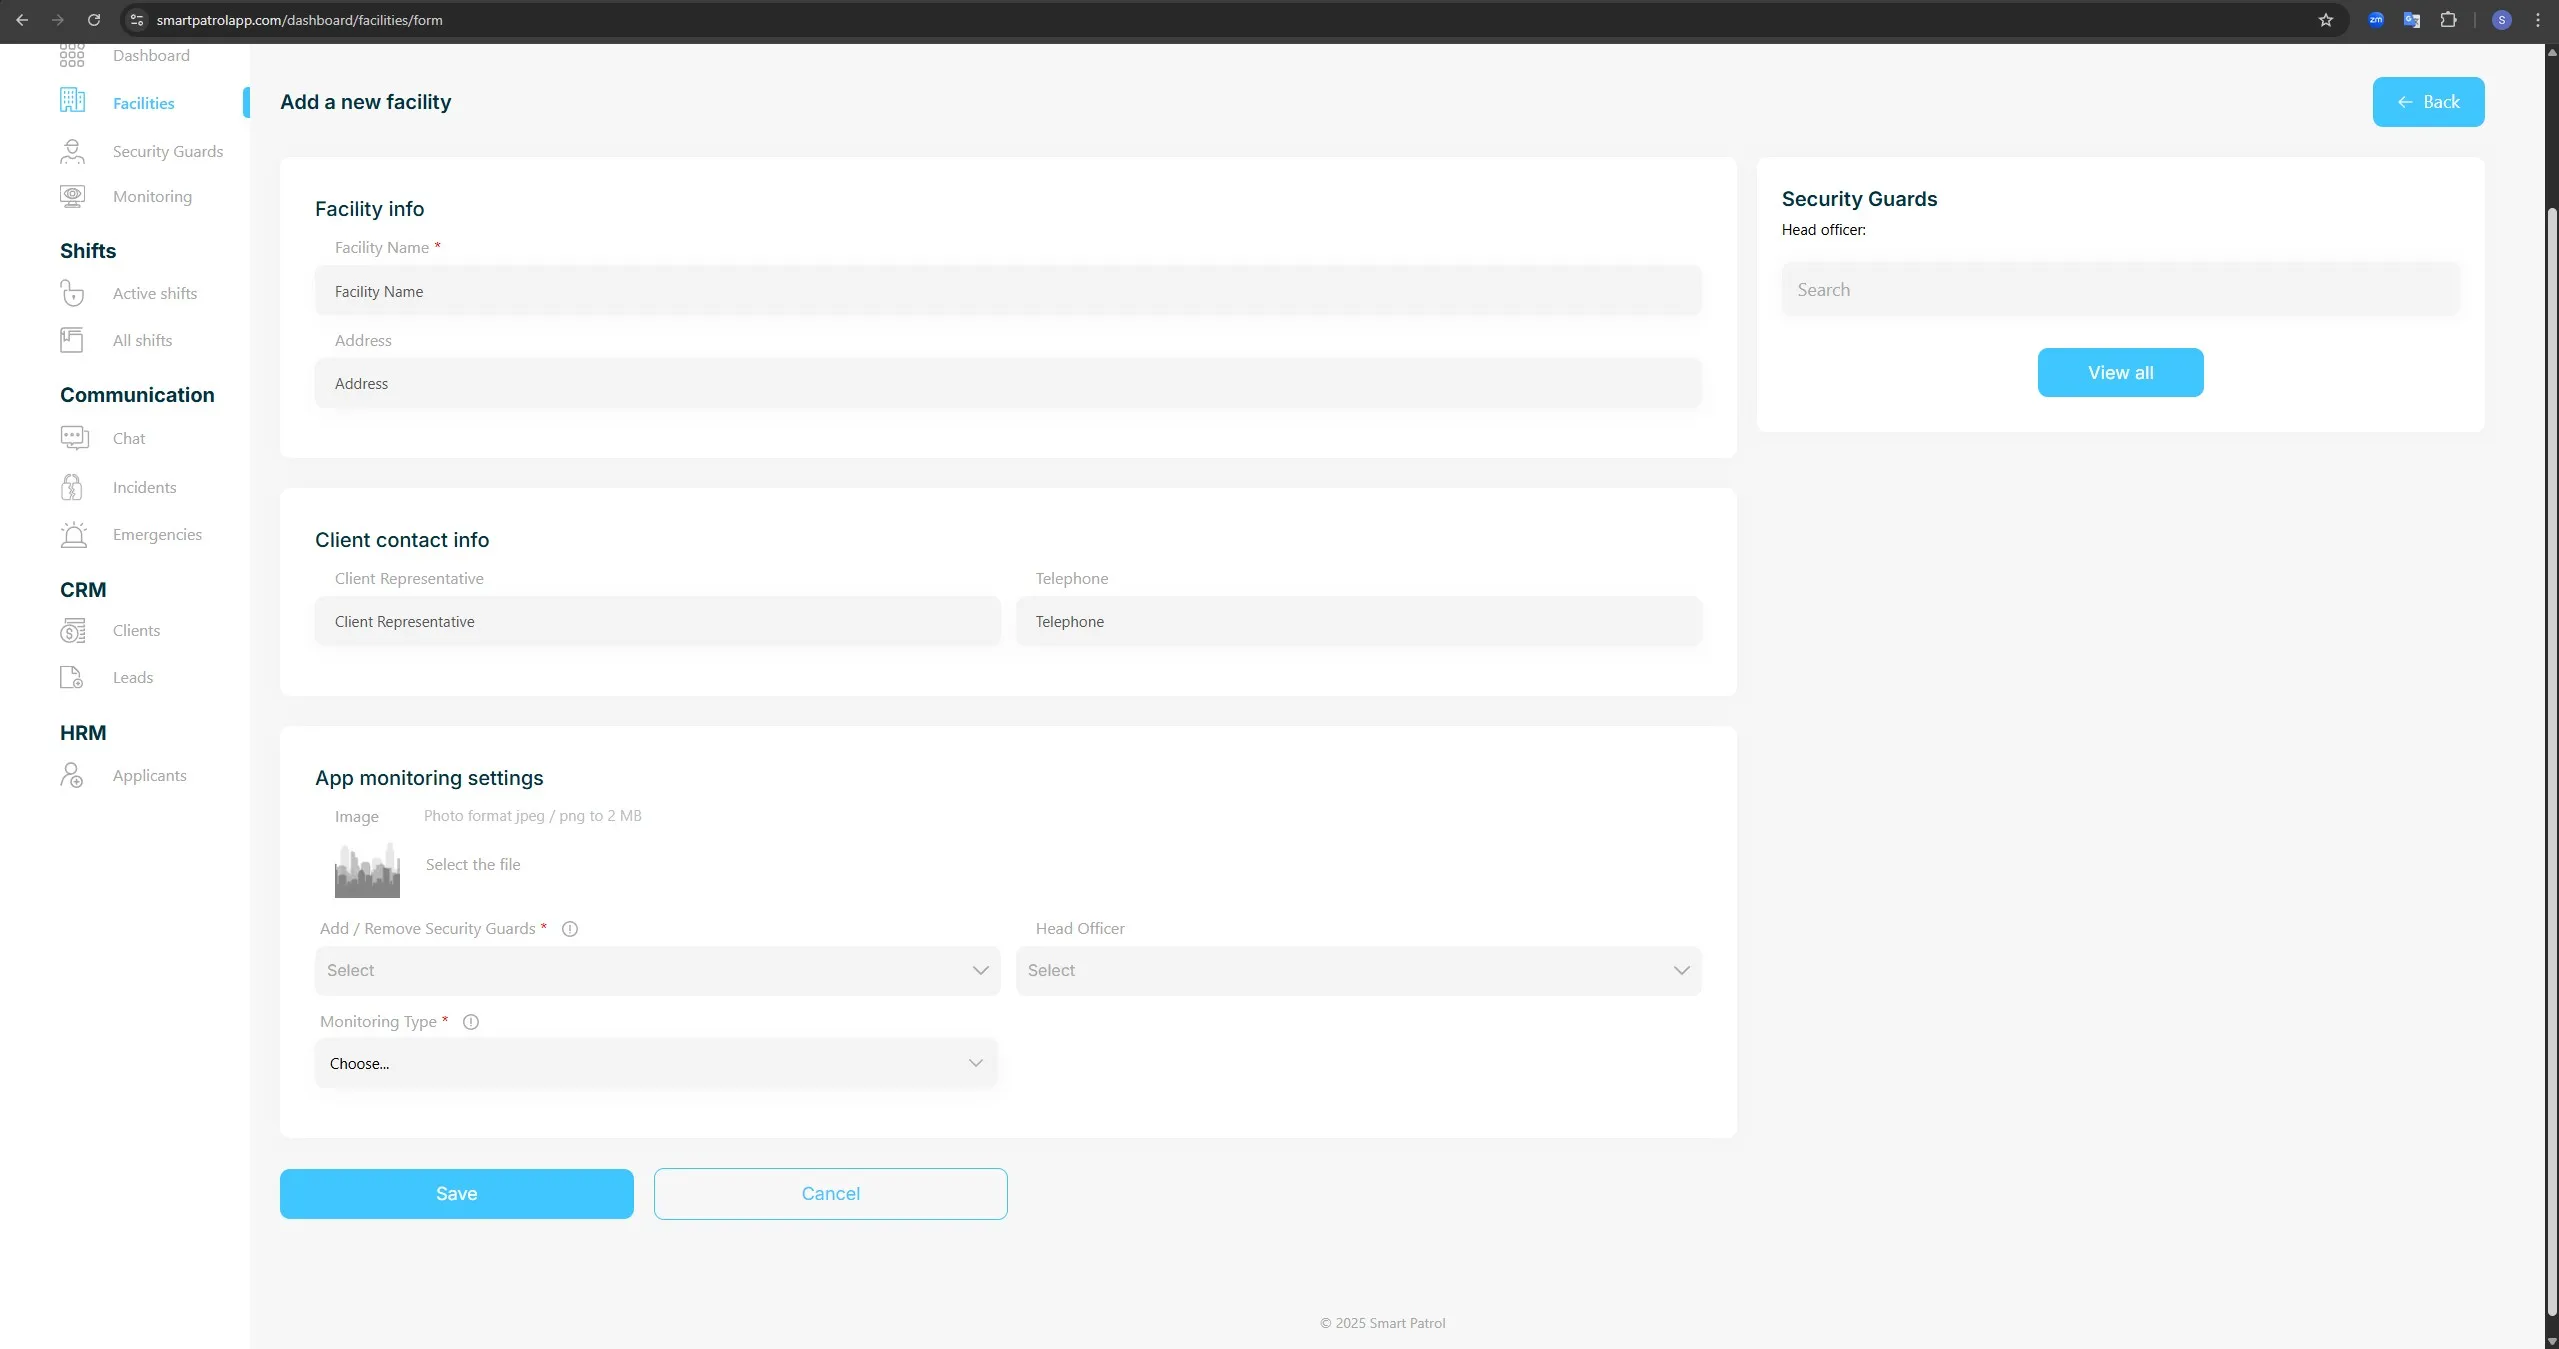
a) Facility Info:
- Facility Name: Enter the name of the facility in the "Facility Name" text field. This field is required (*).
- Address: Provide the address of the facility in the "Address" text field.
b) Client Contact Info:
- Client Representative: Enter the name of the client representative in the "Client Representative" text field.
- Telephone: Input the contact phone number in the "Telephone" text field.
c) App Monitoring Settings:
- Image: Upload an image of the facility by clicking "Select the File" under the "Image" section. Use .png or .jpg format, and ensure the file is less than 2 MB.
- Head Officer: Select the head officer from the dropdown menu labeled "Head Officer."
- Monitor Type: Choose the monitor type from the dropdown menu labeled "Monitor Type." This field is required (*).
d) Security Guards:
- Use the "Search" bar to find and add security guards to the facility.
- Alternatively, click the "View All" button to see a list of available security guards.
6. Save the Facility
- Once all required fields are filled, click the blue "Save" button at the bottom of the form to add the new facility.
- To discard changes, click the "Cancel" button next to it.
7. Return to Facilities List
- After saving, click the "Back" button at the top right to return to the Facilities list.
Note: Ensure all required fields (marked with *) are completed before saving.
