Attention! Images are for informational purposes only and may differ from what appears on your screen.
Follow these steps to add a client using the Smart Patrol web platform:
1. Access the Website
- Open your preferred web browser and navigate to https://smartpatrolapp.com.
2. Log In or Create an Account
- If you already have an account, enter your credentials (email and password) on the login page and click "Log In."
- If you don’t have an account yet, create a new one by following the registration process on the website (e.g., provide email, password, and name).
3. Navigate to Clients
- Once logged in, locate the left sidebar menu on the dashboard.
- Select “Clients” to display a list of currently added clients (Image 1).
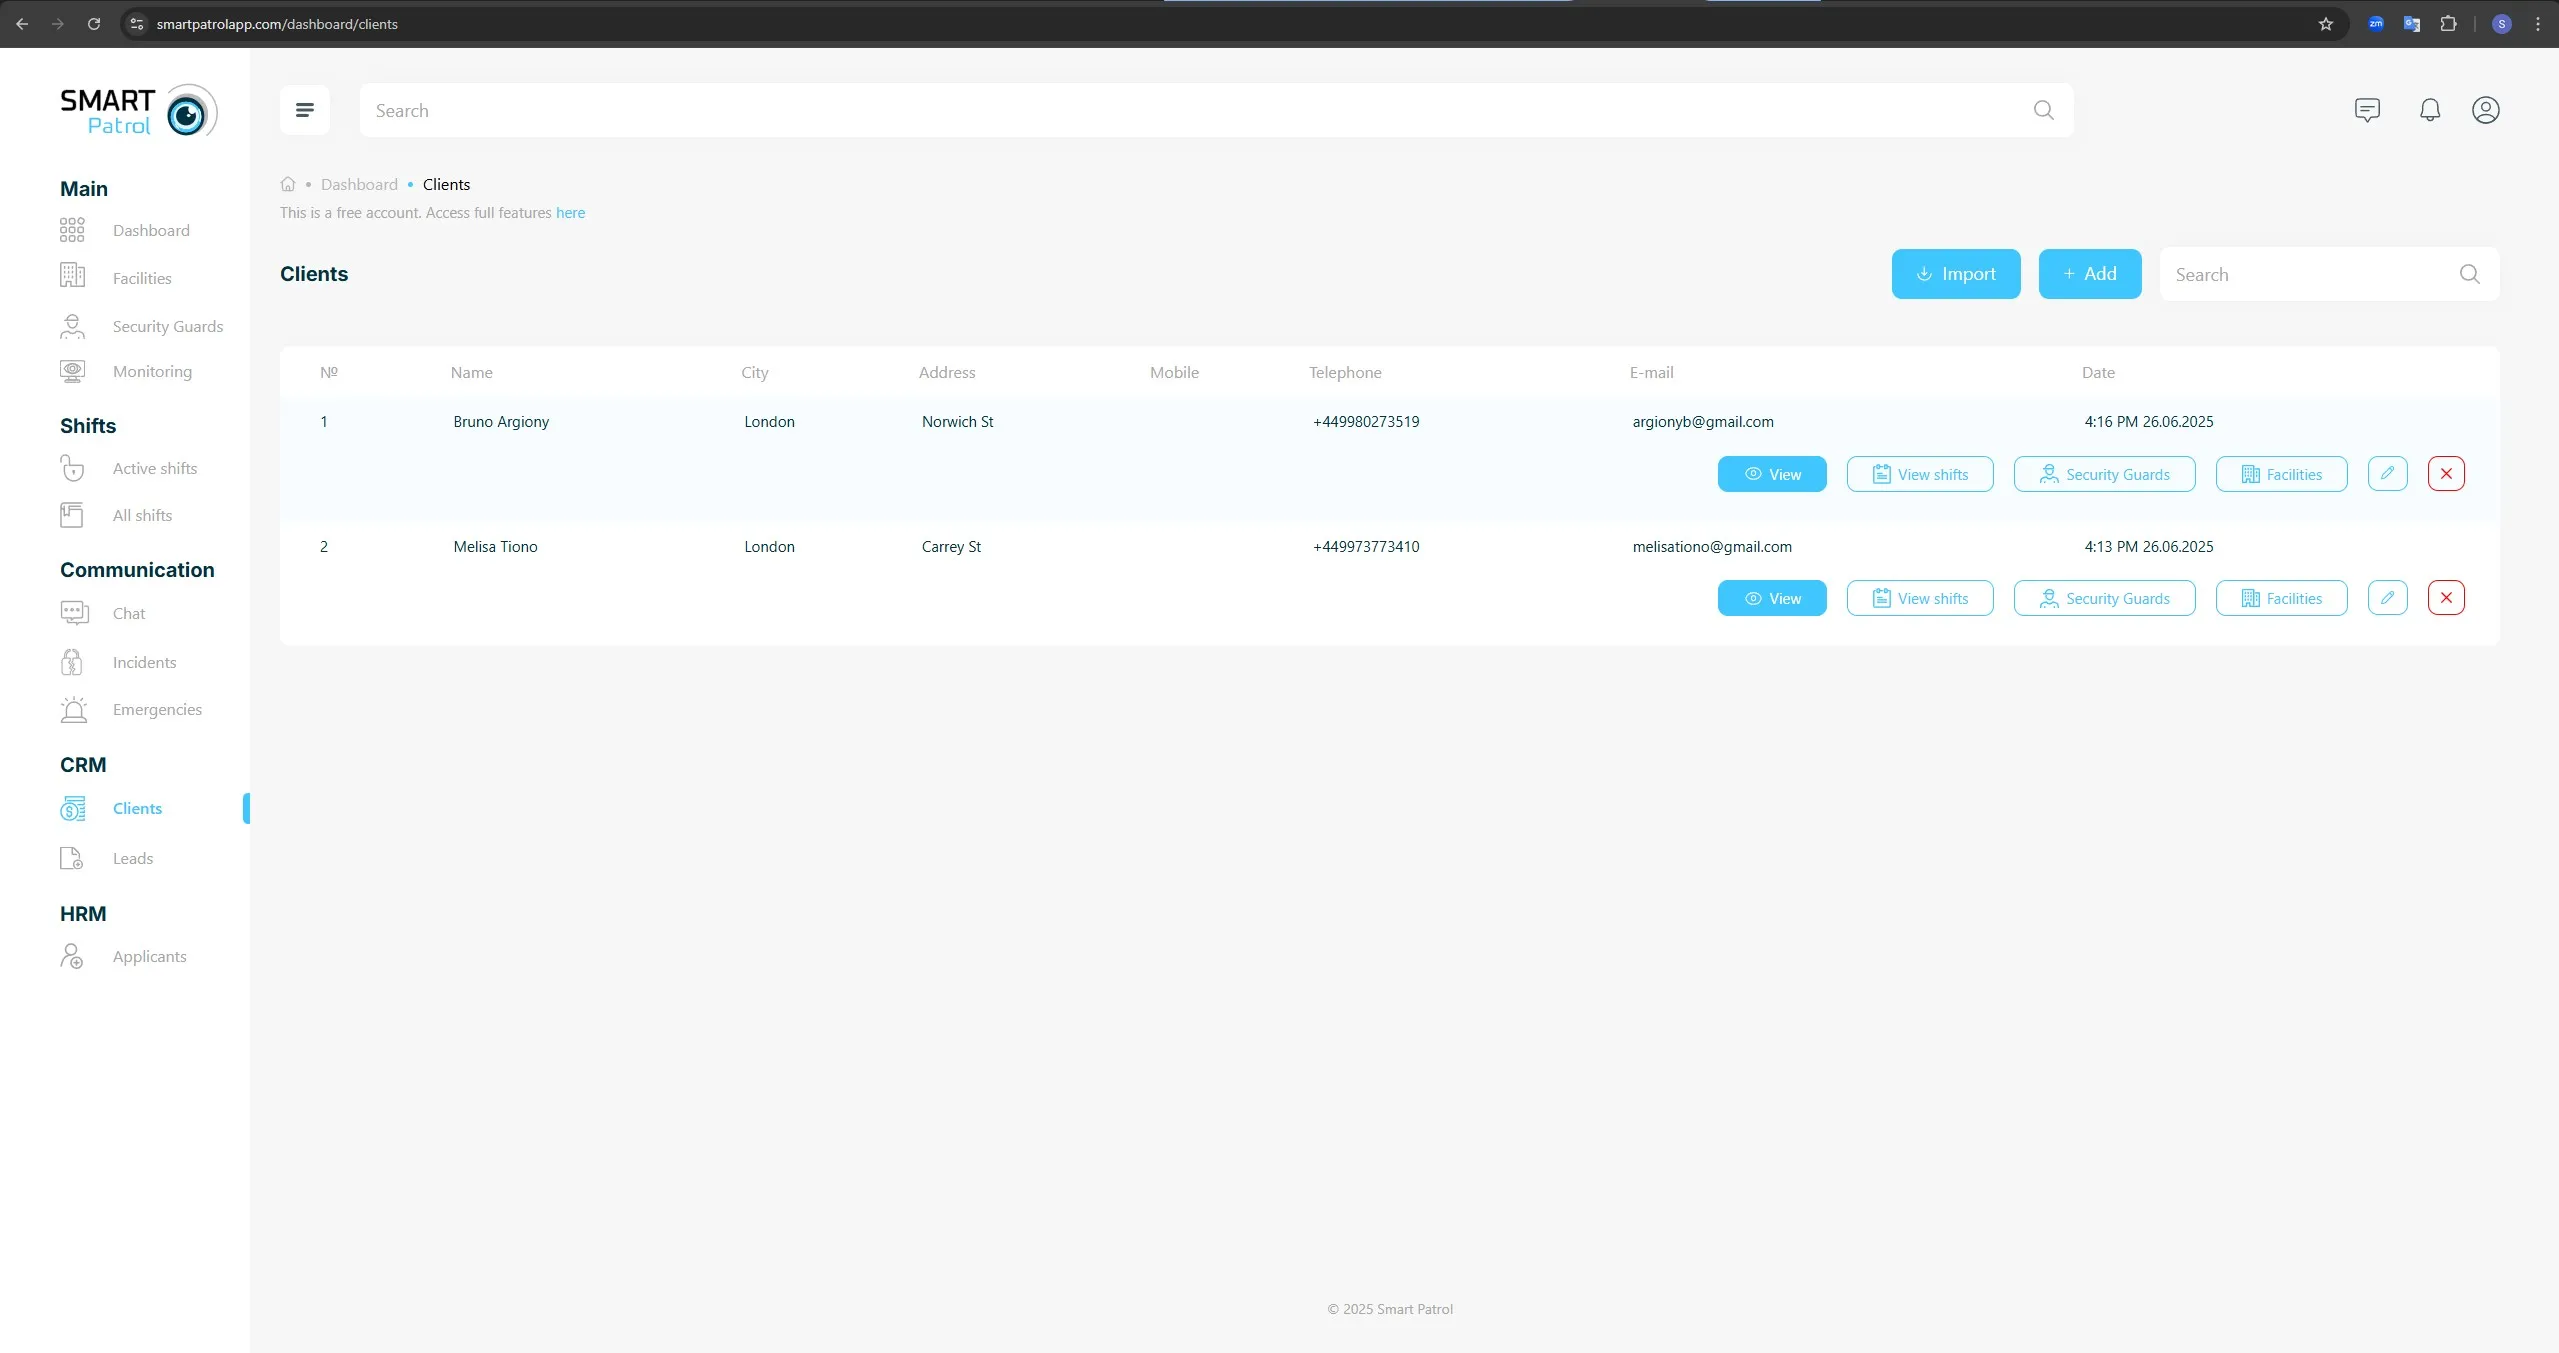
- The "Clients" page includes a table listing details such as:
-
Client names
-
Cities
-
Addresses
-
Contact information
-
Dates
-
Action buttons: "View," "Edit," and "+ Add."
4. Click "+ Add"
- On the "Clients" page, find the "+ Add" button located at the top right of the client list table.
- Click this button to open the form for adding a new client (Image 2).

5. Fill in Client Details
- Enter the required information for the new client in the following fields:
-
Name (required): Enter the client’s full name.
-
City: Specify the client’s city.
-
Address: Provide the client’s full address.
-
Mobile: Enter the client’s mobile phone number.
-
Telephone: Add a landline number if applicable.
-
Email: Input the client’s email address.
-
Assign to Facility: Select a facility from the dropdown menu if the client is associated with a specific location (default is "Select").
-
Image: Optionally, upload an image by clicking "Select the file" (supports JPEG/PNG formats, max 1 MB).
-
Note: Add any additional comments or details about the client in the text area.
6. Save the Client
- After filling in the details, click the "Save" button at the bottom left of the form to add the client to the system.
- If you decide not to proceed, click the "Cancel" button to discard the entries and return to the client list.
7. Verify the Addition
- Once saved, the new client will appear in the "Clients" list.
- Confirm this by checking the table or using the search bar at the top of the page to find the client by name.
Additional Tips:
- Internet Connection: Ensure a stable connection to avoid losing data during the process.
- Required Fields: Verify that all required fields (marked with *) are completed before saving.
- Updates: The layout may vary due to updates—check for the latest browser version if issues arise.
