Attention! Images referenced in this guide are for informational purposes only and may differ from what appears on your screen due to ongoing development.
This guide combines the processes of creating position types, adding candidates, and converting them into security guards in the Smart Patrol HRM system. Follow the steps below for a seamless workflow.
1. Open the Website
- Open your browser and navigate to https://smartpatrolapp.com.
2. Log In or Create an Account
- Log in to your existing account using your credentials. If you don’t have an account, create one by following the registration process on the website.
3. Navigate to Applicants
- In the left sidebar menu, under the “HRM” section, select “Applicants” to access the Applicants page (Image 1).
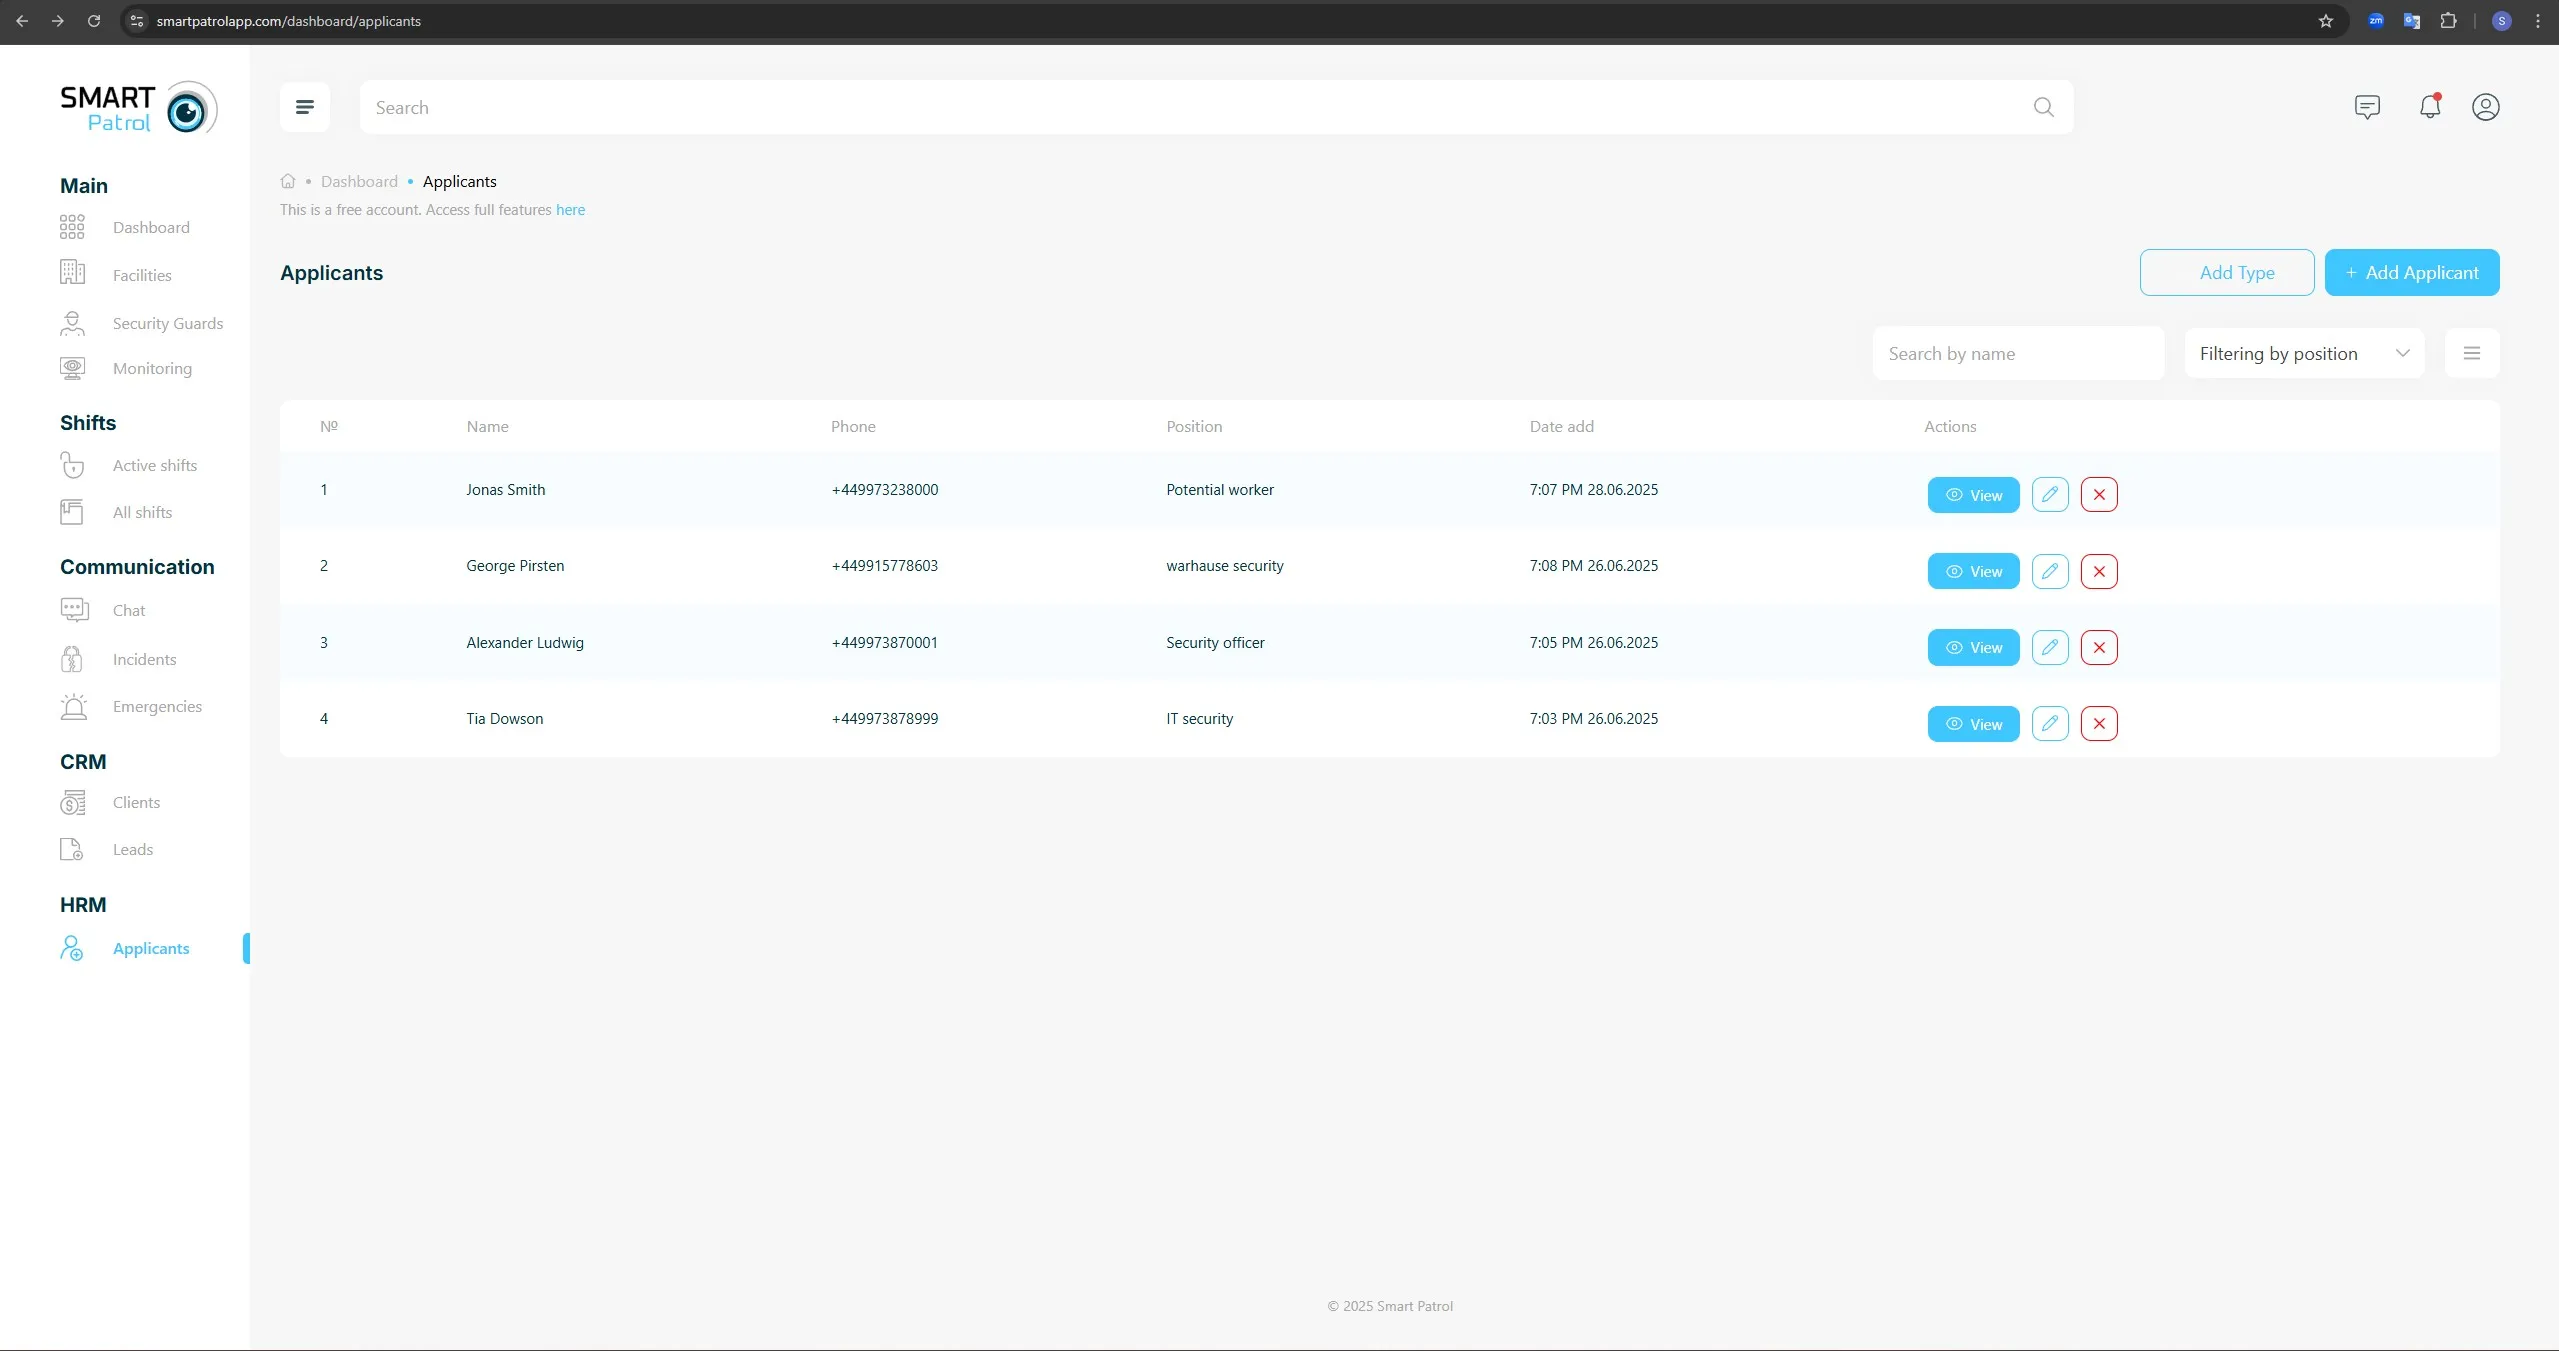
- The Applicants page displays a table listing existing candidates with columns such as "Name," "Phone," "Position," "Date Added," and "Actions" (e.g., View, Edit, Delete).
4. Create a Position Type
- Locate the “Add Type” button in the top-right corner of the Applicants page. This may appear as a blue outline button with a plus (+) icon or text (Image 2).
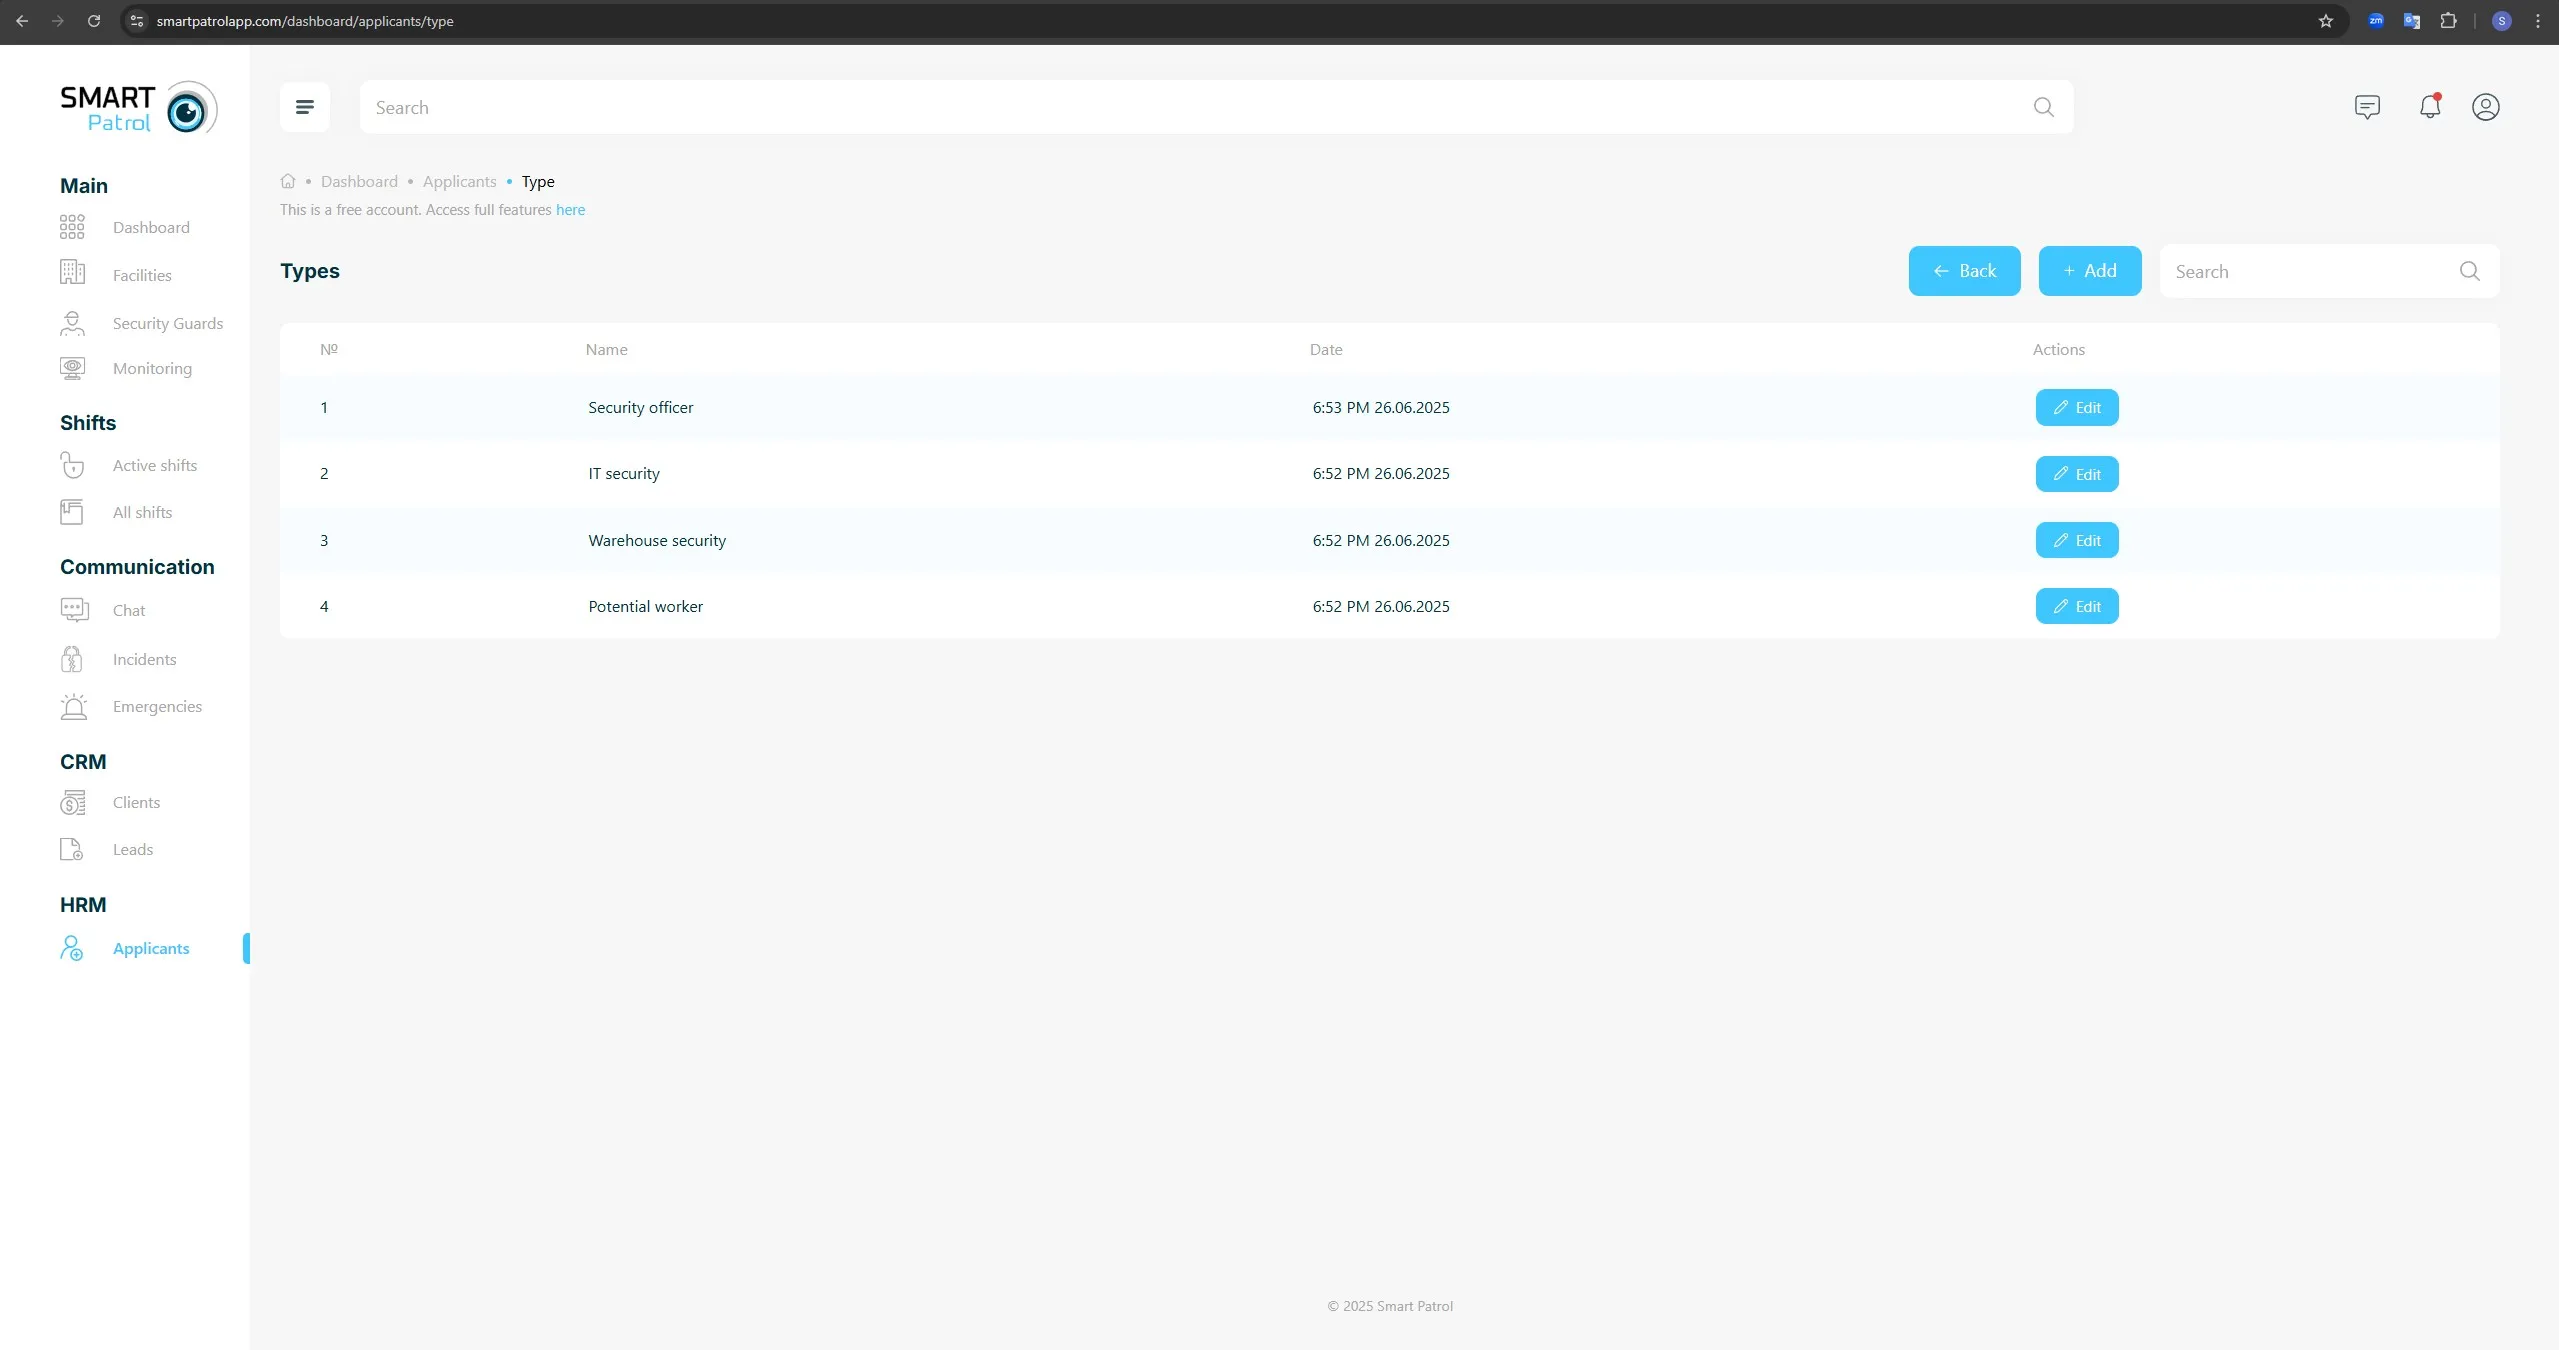
- Click “Add Type” to open the position type management section.
- In the position type section, view the table of existing types (e.g., "Security Officer," "IT Security," "Warehouse Security").
- Click the “+ Add” button to open a pop-up window for creating a new type (Image 3).
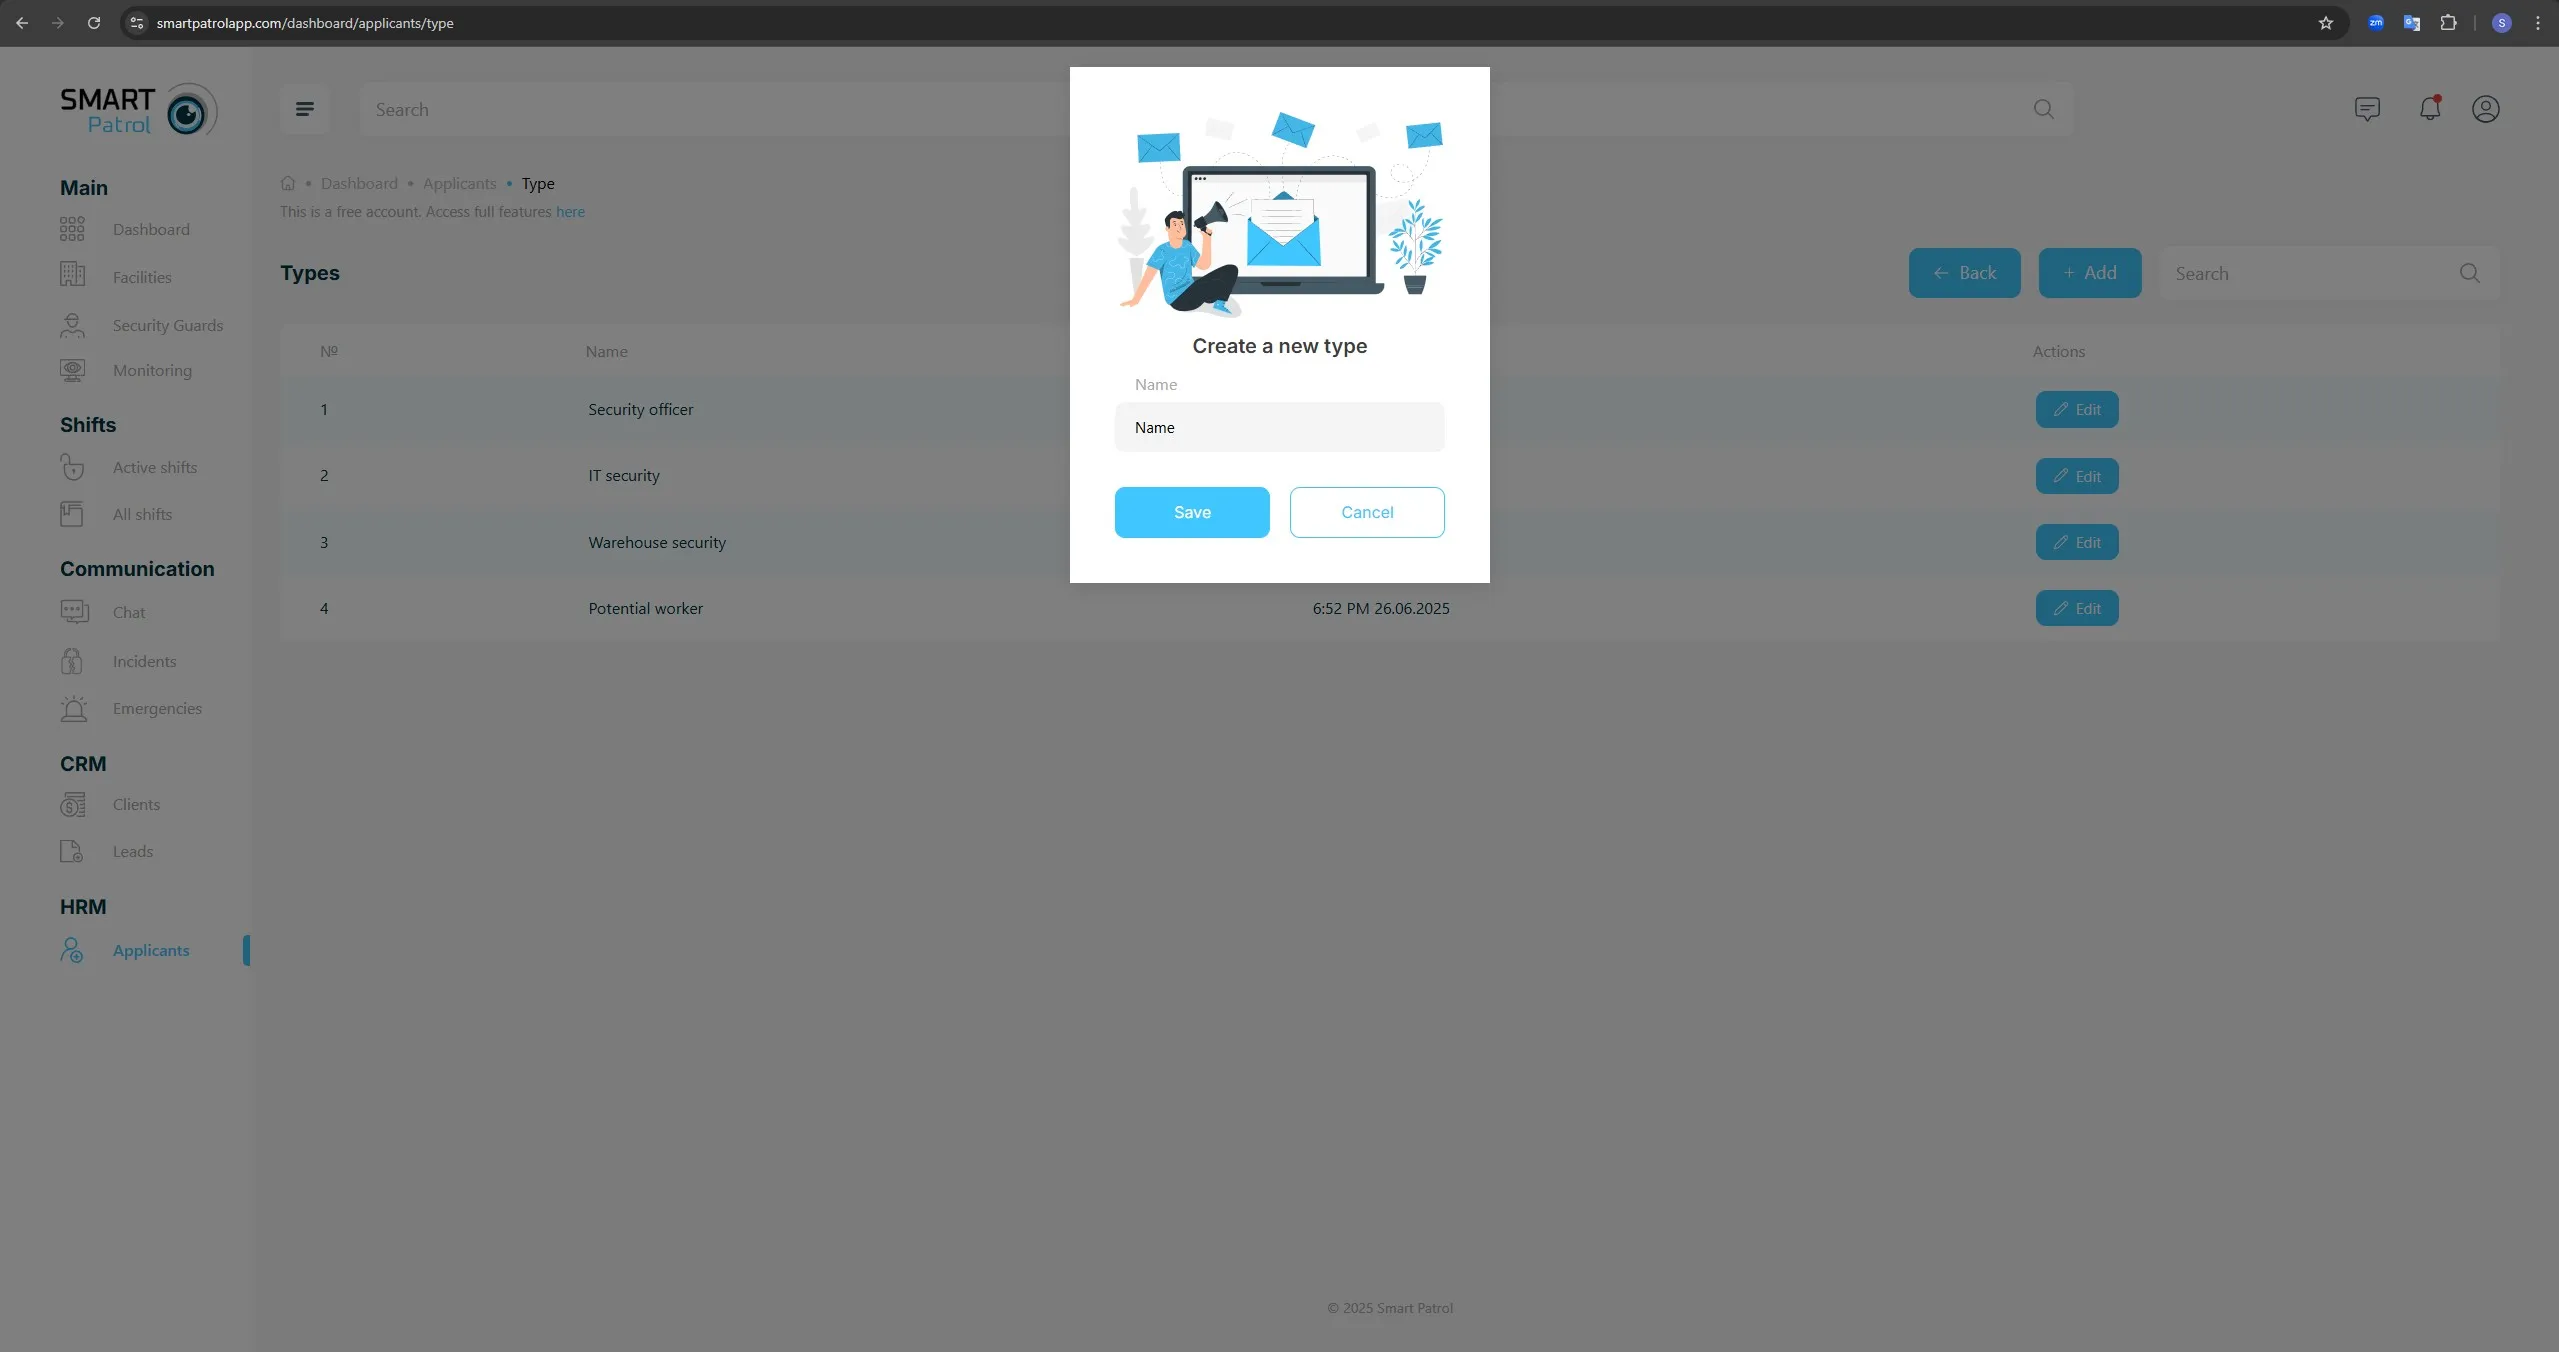
- Enter the name of the new position type (e.g., "Night Shift Officer") in the “Name” field.
- Click “Save” to confirm the creation. The new position type will now appear in the list.
- To cancel, click “Cancel” and close the pop-up.
- To delete a position type, first unassign any applicants from it. Then, in the “Add Type” position type list, press the red cross button to remove it.
Note: Ensure the position type name is clear and reflects the role accurately, as it will be used when creating candidate profiles.
5. Create a Candidate’s Profile
- Return to the Applicants page by clicking the “Back” button or navigating via the sidebar.
- Locate the “Add Applicant” button in the top-right corner. This may appear as a solid blue button with a plus (+) icon or text.
- Click “Add Applicant” to open the candidate profile creation form.
- Complete the required fields (marked with an asterisk *) (Image 4):
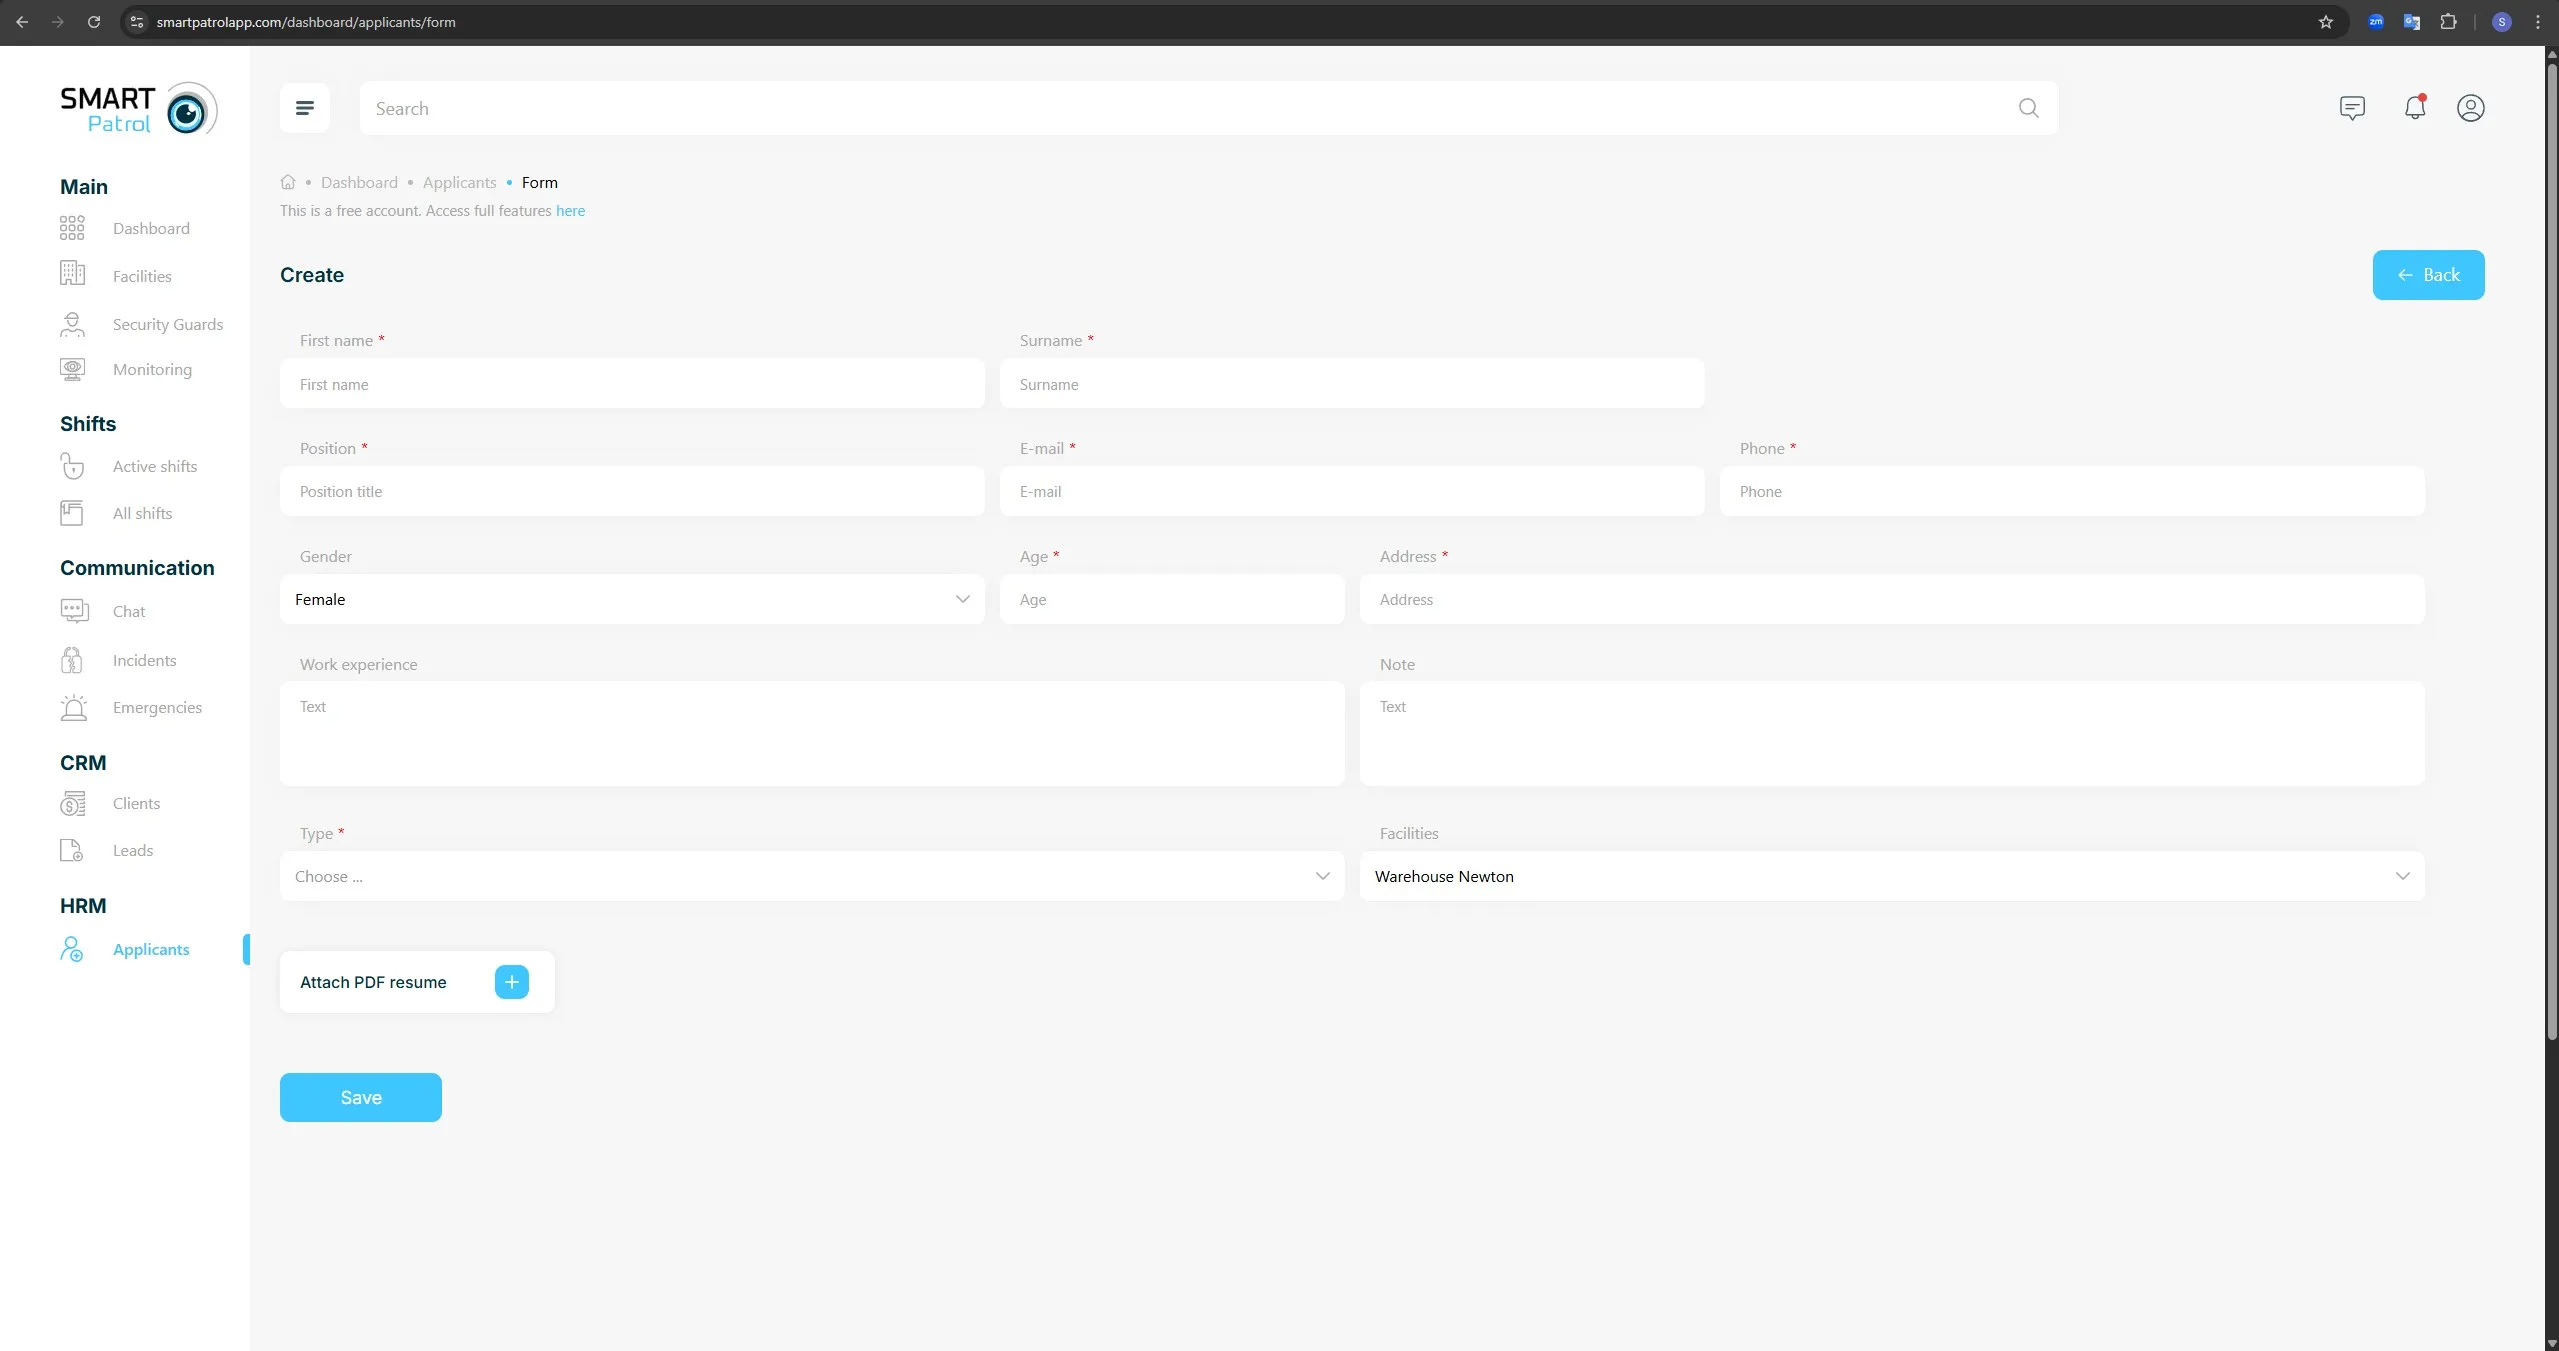
- First Name: Enter the candidate’s first name.
- Surname: Enter the candidate’s surname.
- E-mail: Provide the candidate’s email address.
- Phone: Enter the candidate’s contact number.
- Address: Provide the candidate’s residential address.
- Other Details: Fill in optional fields such as "Gender," "Age," "Work Experience," or "Note" if applicable.
- In the “Type” dropdown (marked with an asterisk), select the position type created earlier to link the candidate to the specific role.
- In the “Facilities” dropdown, select the facility where the candidate may be assigned upon hiring.
- Use the “Attach PDF Resume” option to upload the candidate’s resume in PDF format, or use the “Image” field to upload a photo (e.g., "Photo format: .jpeg / .png 1 MB").
- Review the entered information for accuracy, then click the “Save” button to create the profile. To discard changes, click “Cancel” and return to the Applicants page.
- Verify the addition by checking the Applicants page table. Use the search bar or filters (e.g., "Search by name," "Filtering by position") to locate the candidate if needed.
- Note: Ensure all required fields are completed accurately, as incomplete profiles may delay the hiring process.
6. Convert a Candidate into a Security Guard
- Select a candidate from the Applicants page list and click the “View” button next to their name to open their profile.
- On the candidate’s profile page, click the “Accept” button to begin the conversion process.
- A pop-up window will appear. Select “Manually” to proceed to the security guard creation page, or select “Send Invitational Link” to send an invite via email.
- On the creation page, some fields (e.g., name, email) will be pre-filled from the candidate’s data. Fill in any additional required fields, such as job title, password, or facility assignment.
- Once all necessary fields are completed, click the “Save” button to finalize the conversion of the candidate into a security guard.
Note: Ensure all required fields are filled before saving, as incomplete data may prevent successful conversion.
Additional Tips:
- Validation: Double-check all mandatory fields to avoid errors during creation or conversion.
- Permissions: Creating position types, adding candidates, or converting them may require administrative access—contact support if restricted.
- Efficiency: Use the search and filter options on the Applicants page to manage large lists effectively.
- Resume Upload: Ensure the PDF resume is within the file size limit (e.g., 1 MB) to avoid upload errors.
- Facility Assignment: Pre-assigning facilities during candidate creation helps streamline the hiring process.
