Attention! Images are for informational purposes only and may differ from what appears on your screen.
Follow these steps to manage leads and tasks in the Smart Patrol CRM on the web platform:
1. Open the Website
- Open https://smartpatrolapp.com in your preferred web browser.
2. Log In or Create an Account
- Log in to your existing account using your credentials. If you don’t have an account yet, create a new one by following the registration process on the website.
3. Navigate to Leads
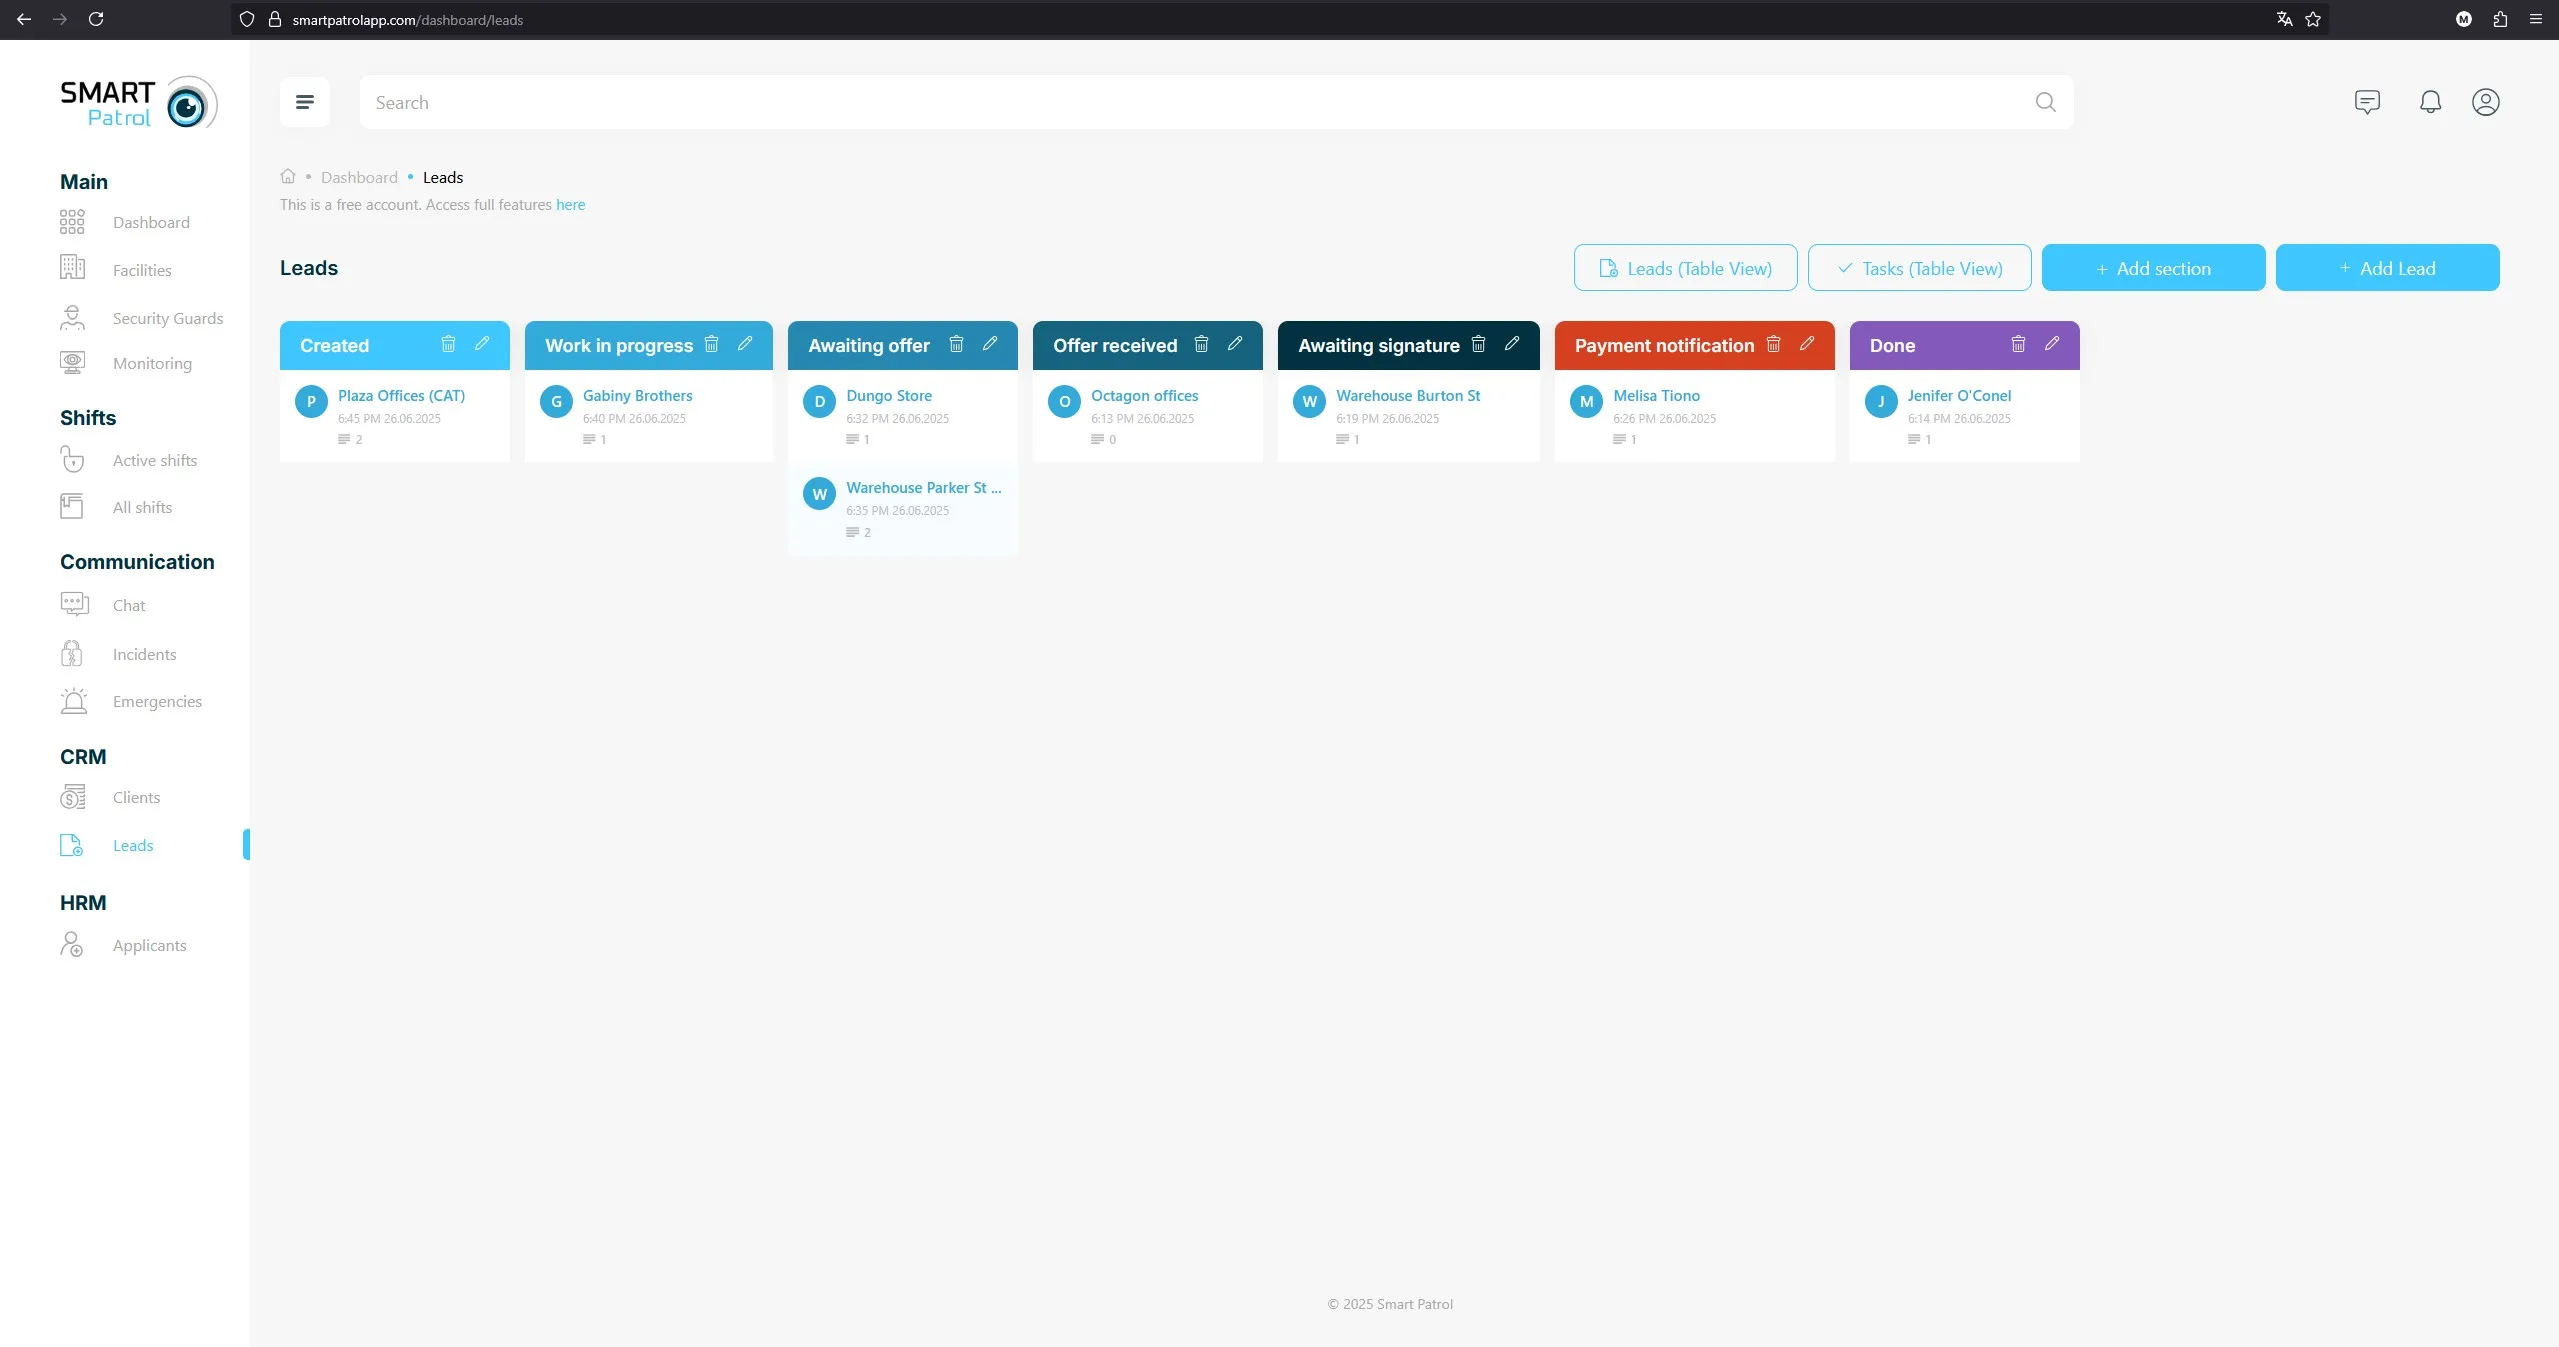
- In the left menu, select “Leads” to view the leads page (Image 1).
4. Create a New Lead
- Click the “+Add Lead” button to open the lead creation page (Image 2).

- Fill in the following fields:
- Status - a dropdown menu of lead statuses.
- Company name
- Phone number
- Address of the contact’s company
- Name of the contact person
- Personal phone number
- Job title
- Click the "Save" button to save the lead or the "Cancel" button to discard the creation.
5. View and Manage a Lead
- Choose a lead from the list and click on it to view details (Image 3).
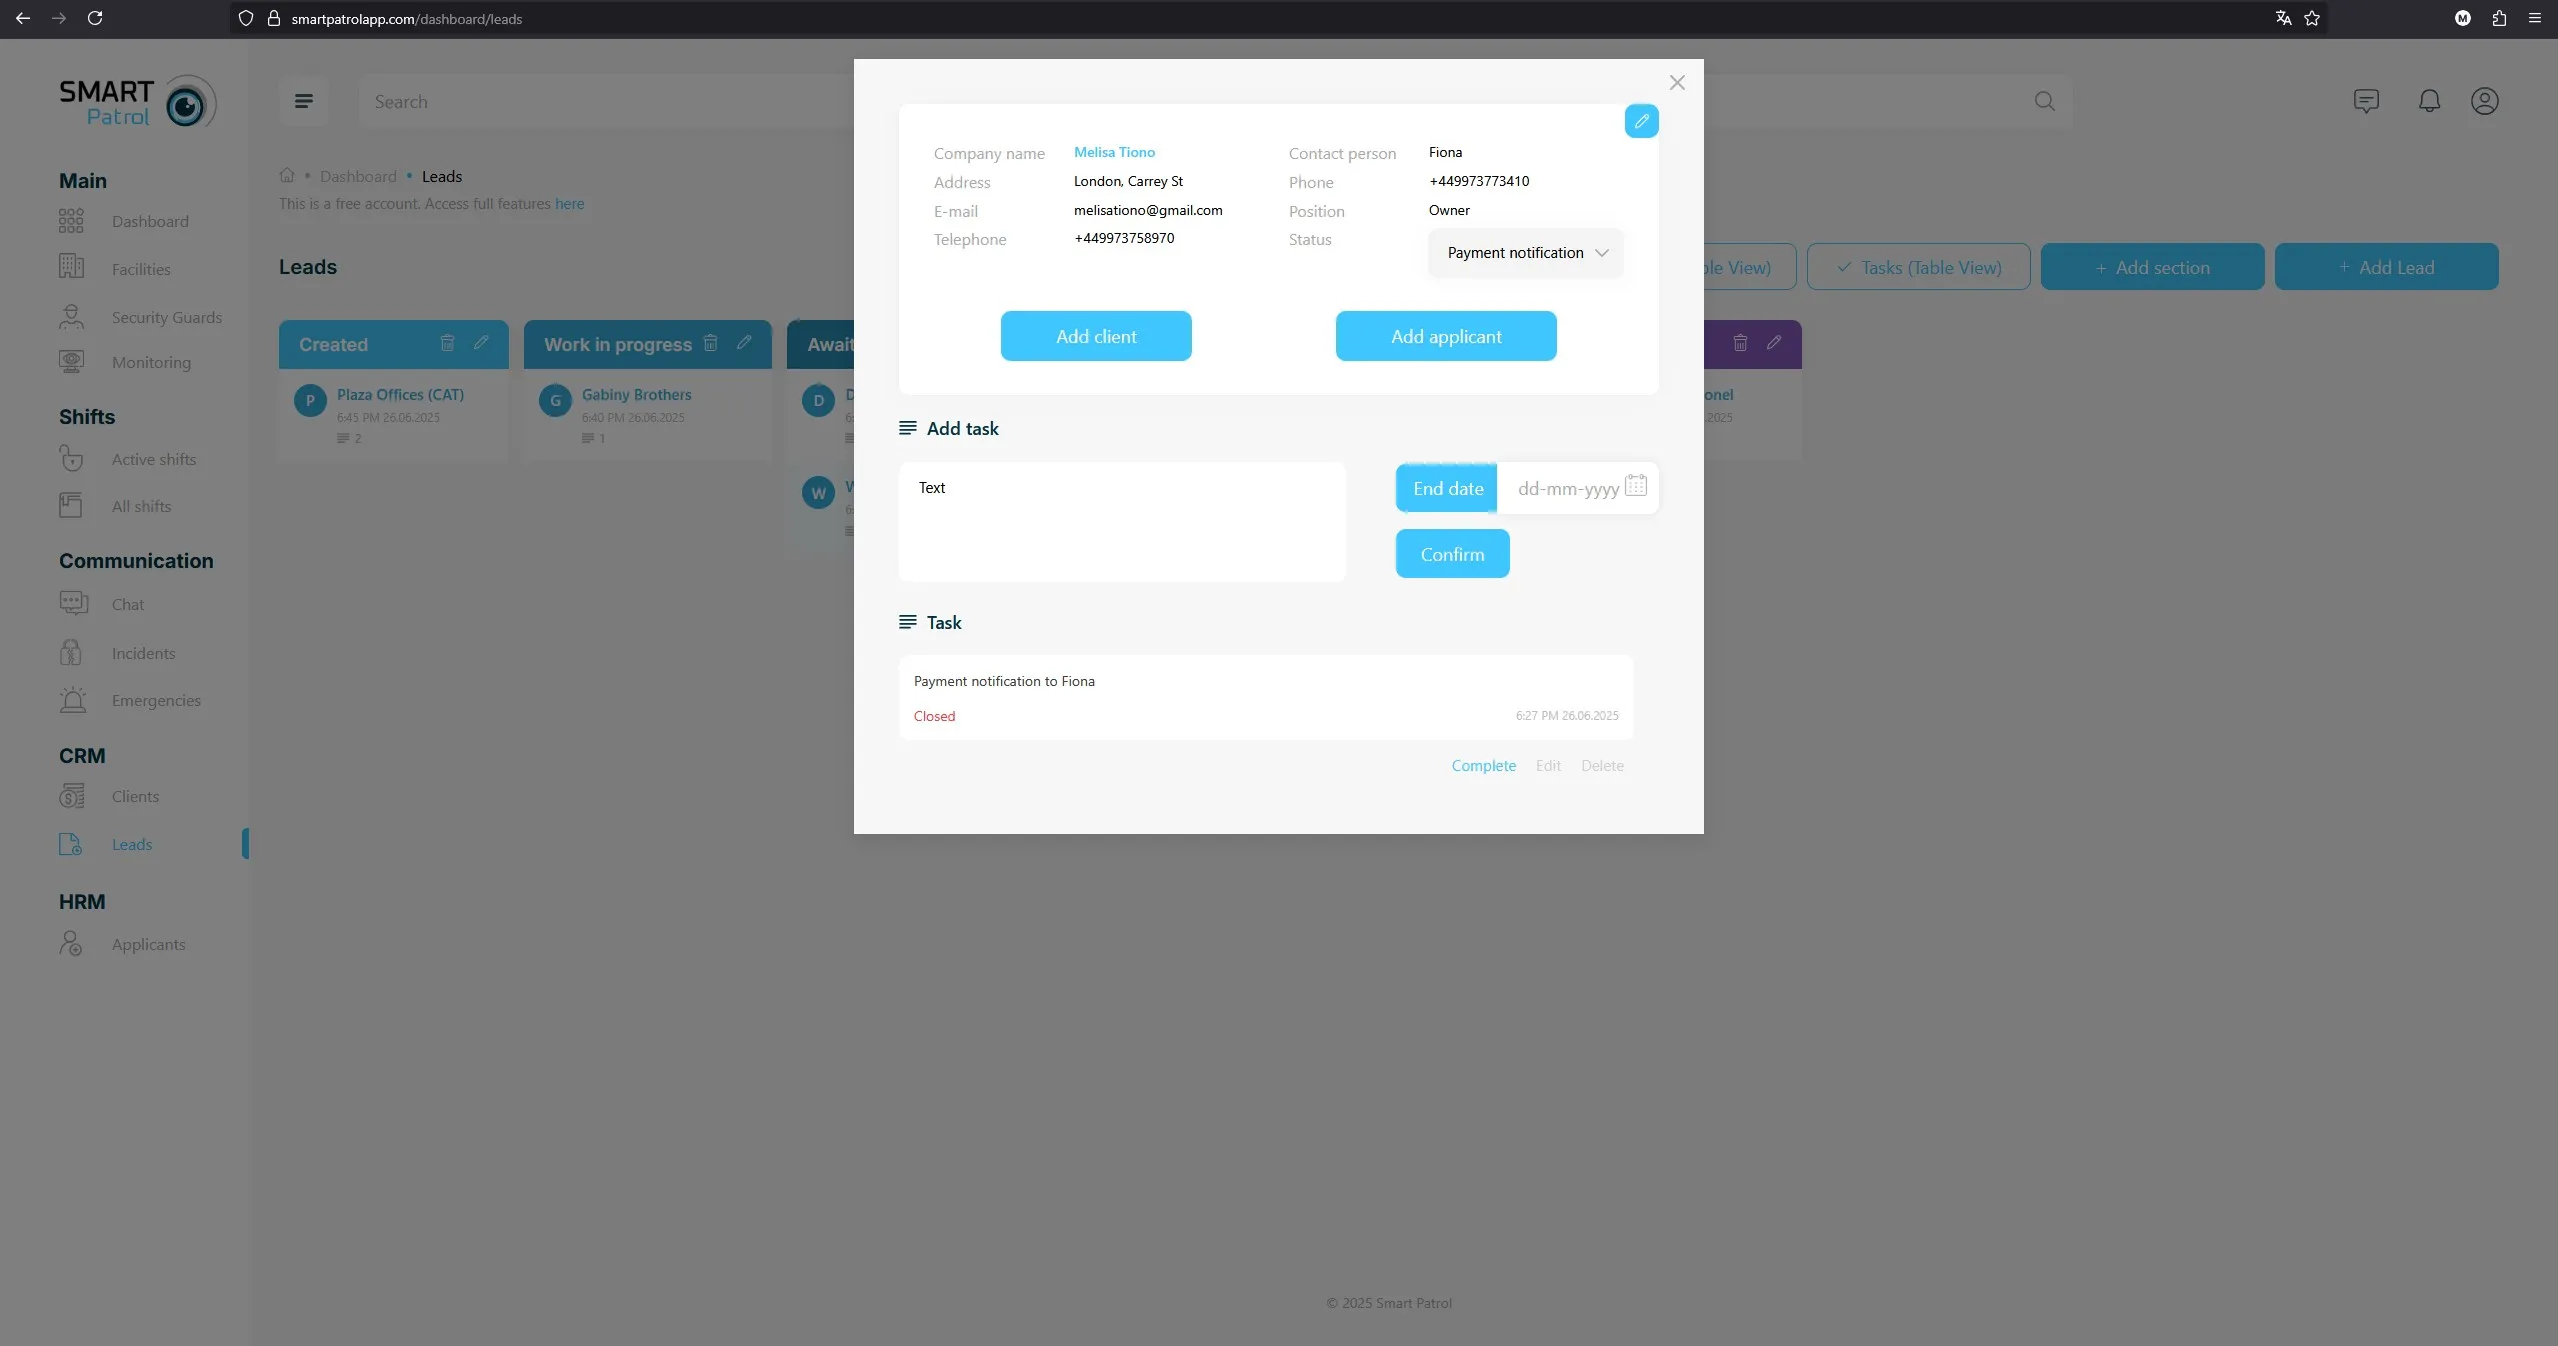
- To create a task, fill in the "Text" field under the "Add Task" label, select an "End Date", then click the 'Confirm' button to save the task. A single lead can have multiple tasks.
- Manage tasks with these options:
- Click "Complete" to mark a task as done.
- Click "Edit" to modify a task.
- Click "Delete" to remove a task.
- Tasks with expired "End Date" will be highlighted in red.
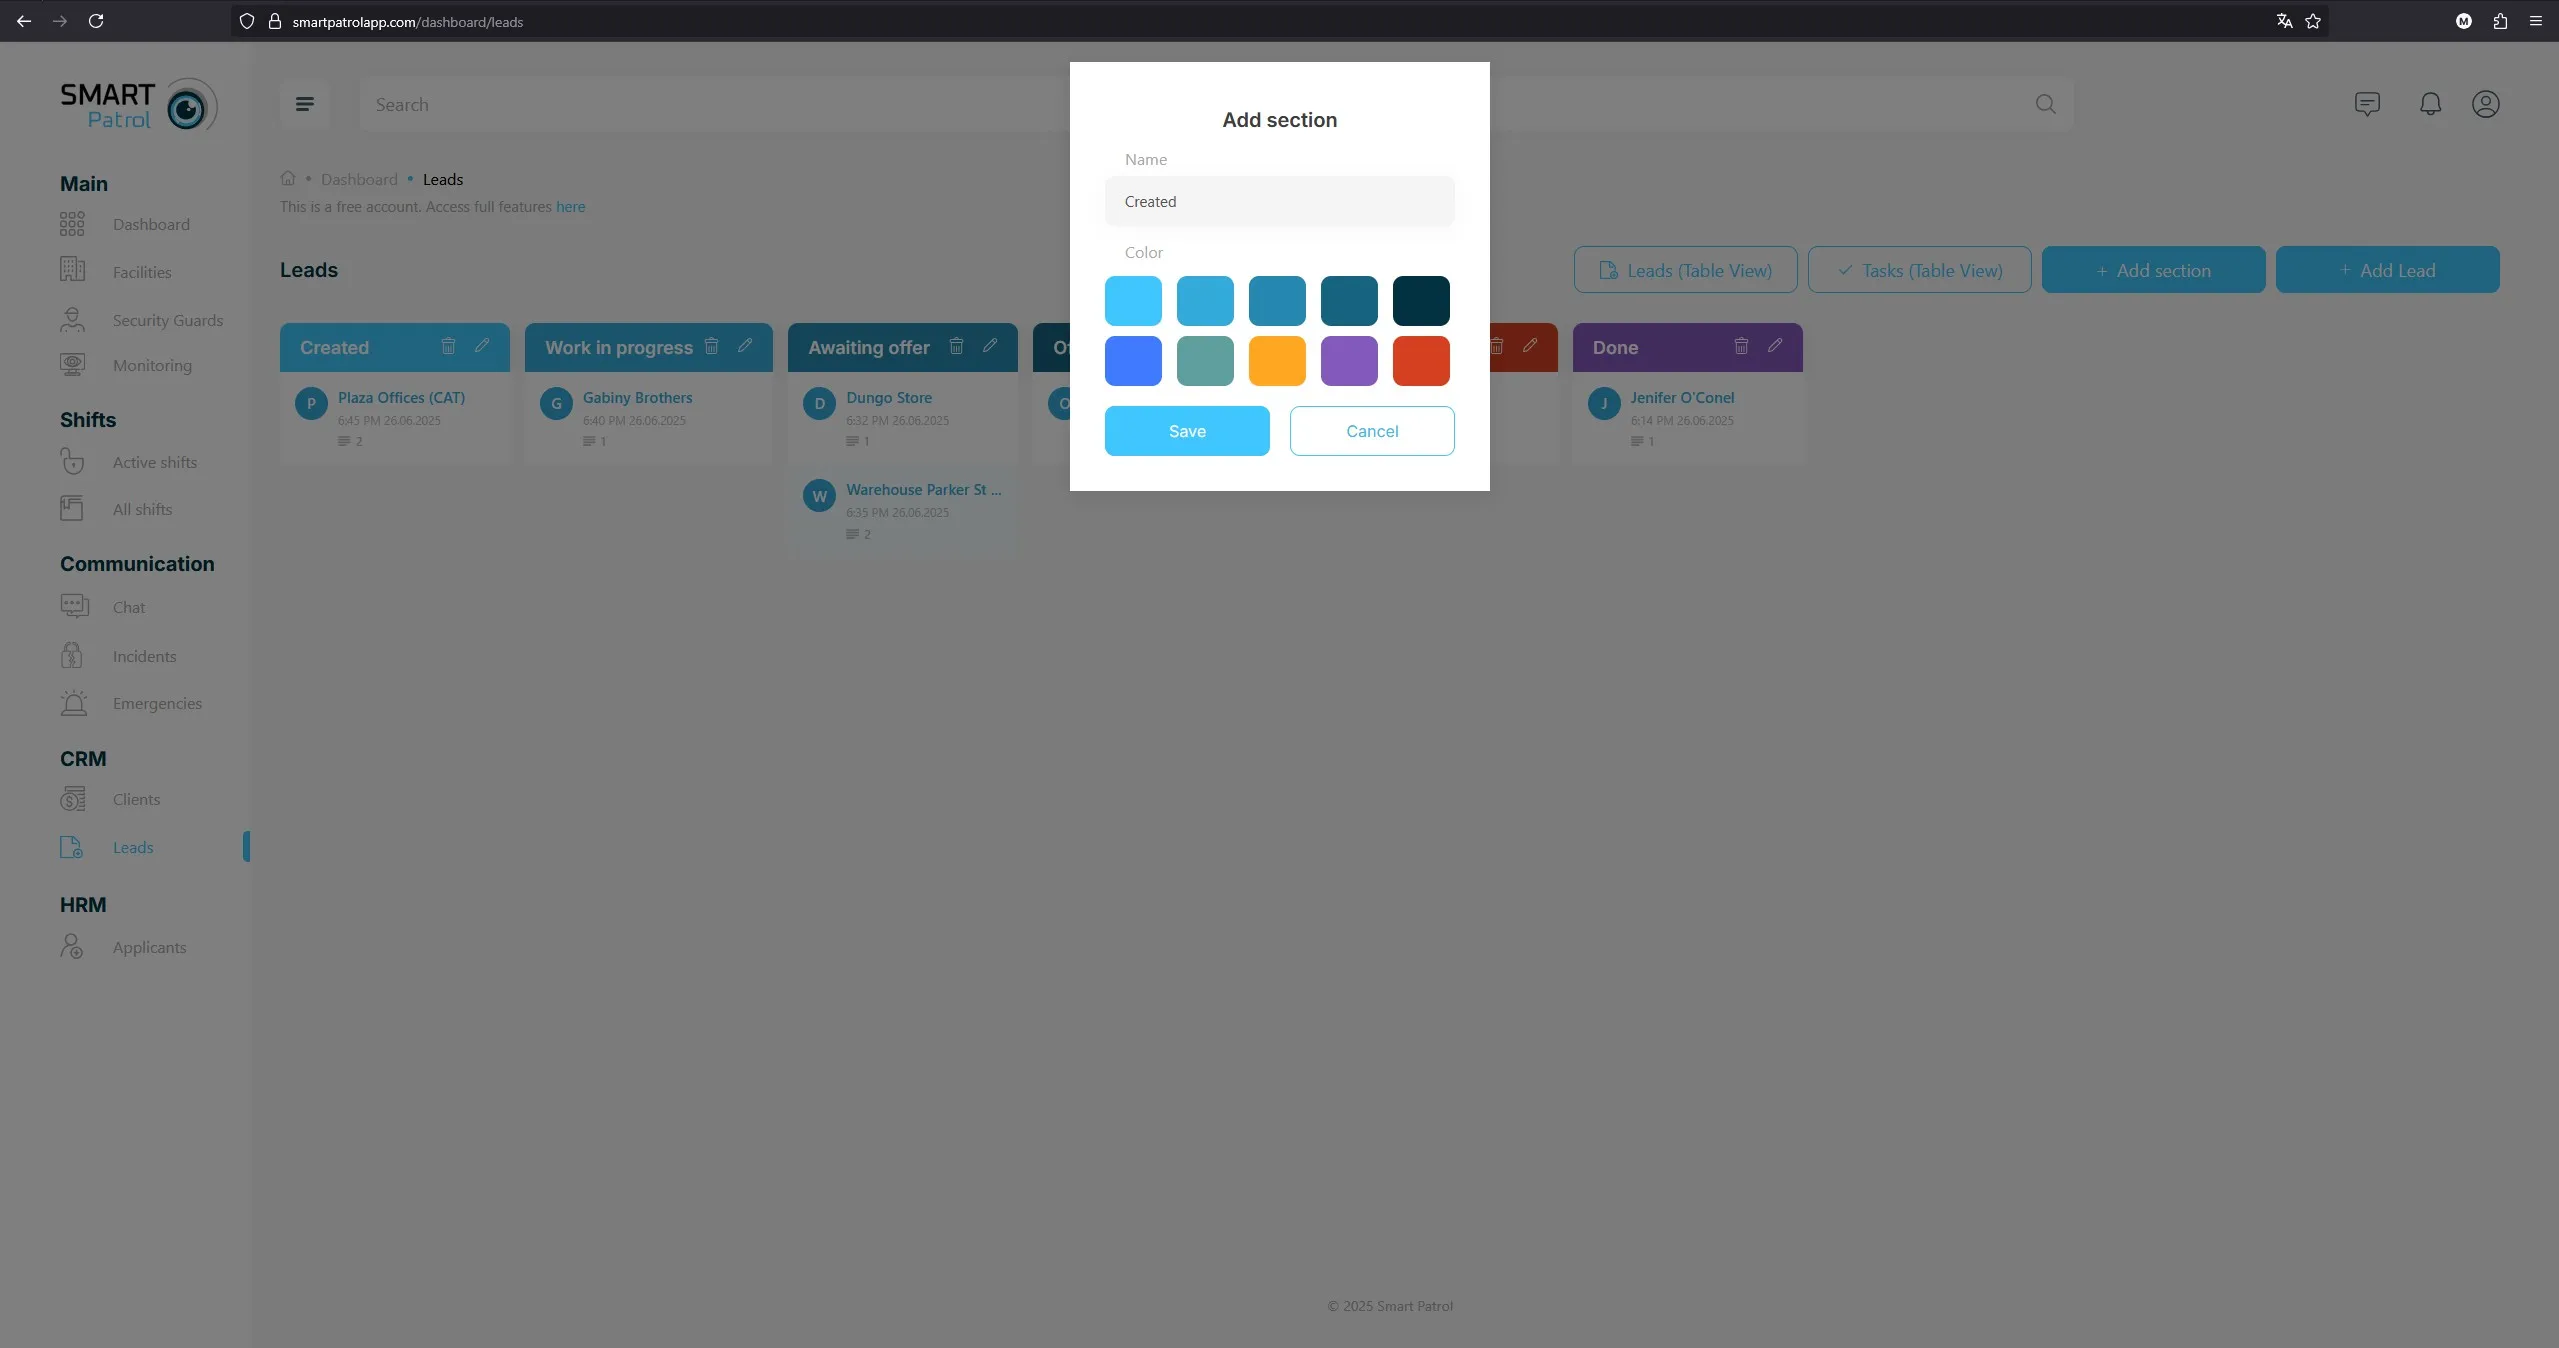
6. Create a New Lead Status
- To add a new status, access the status creation feature and define the new status (Image 4).
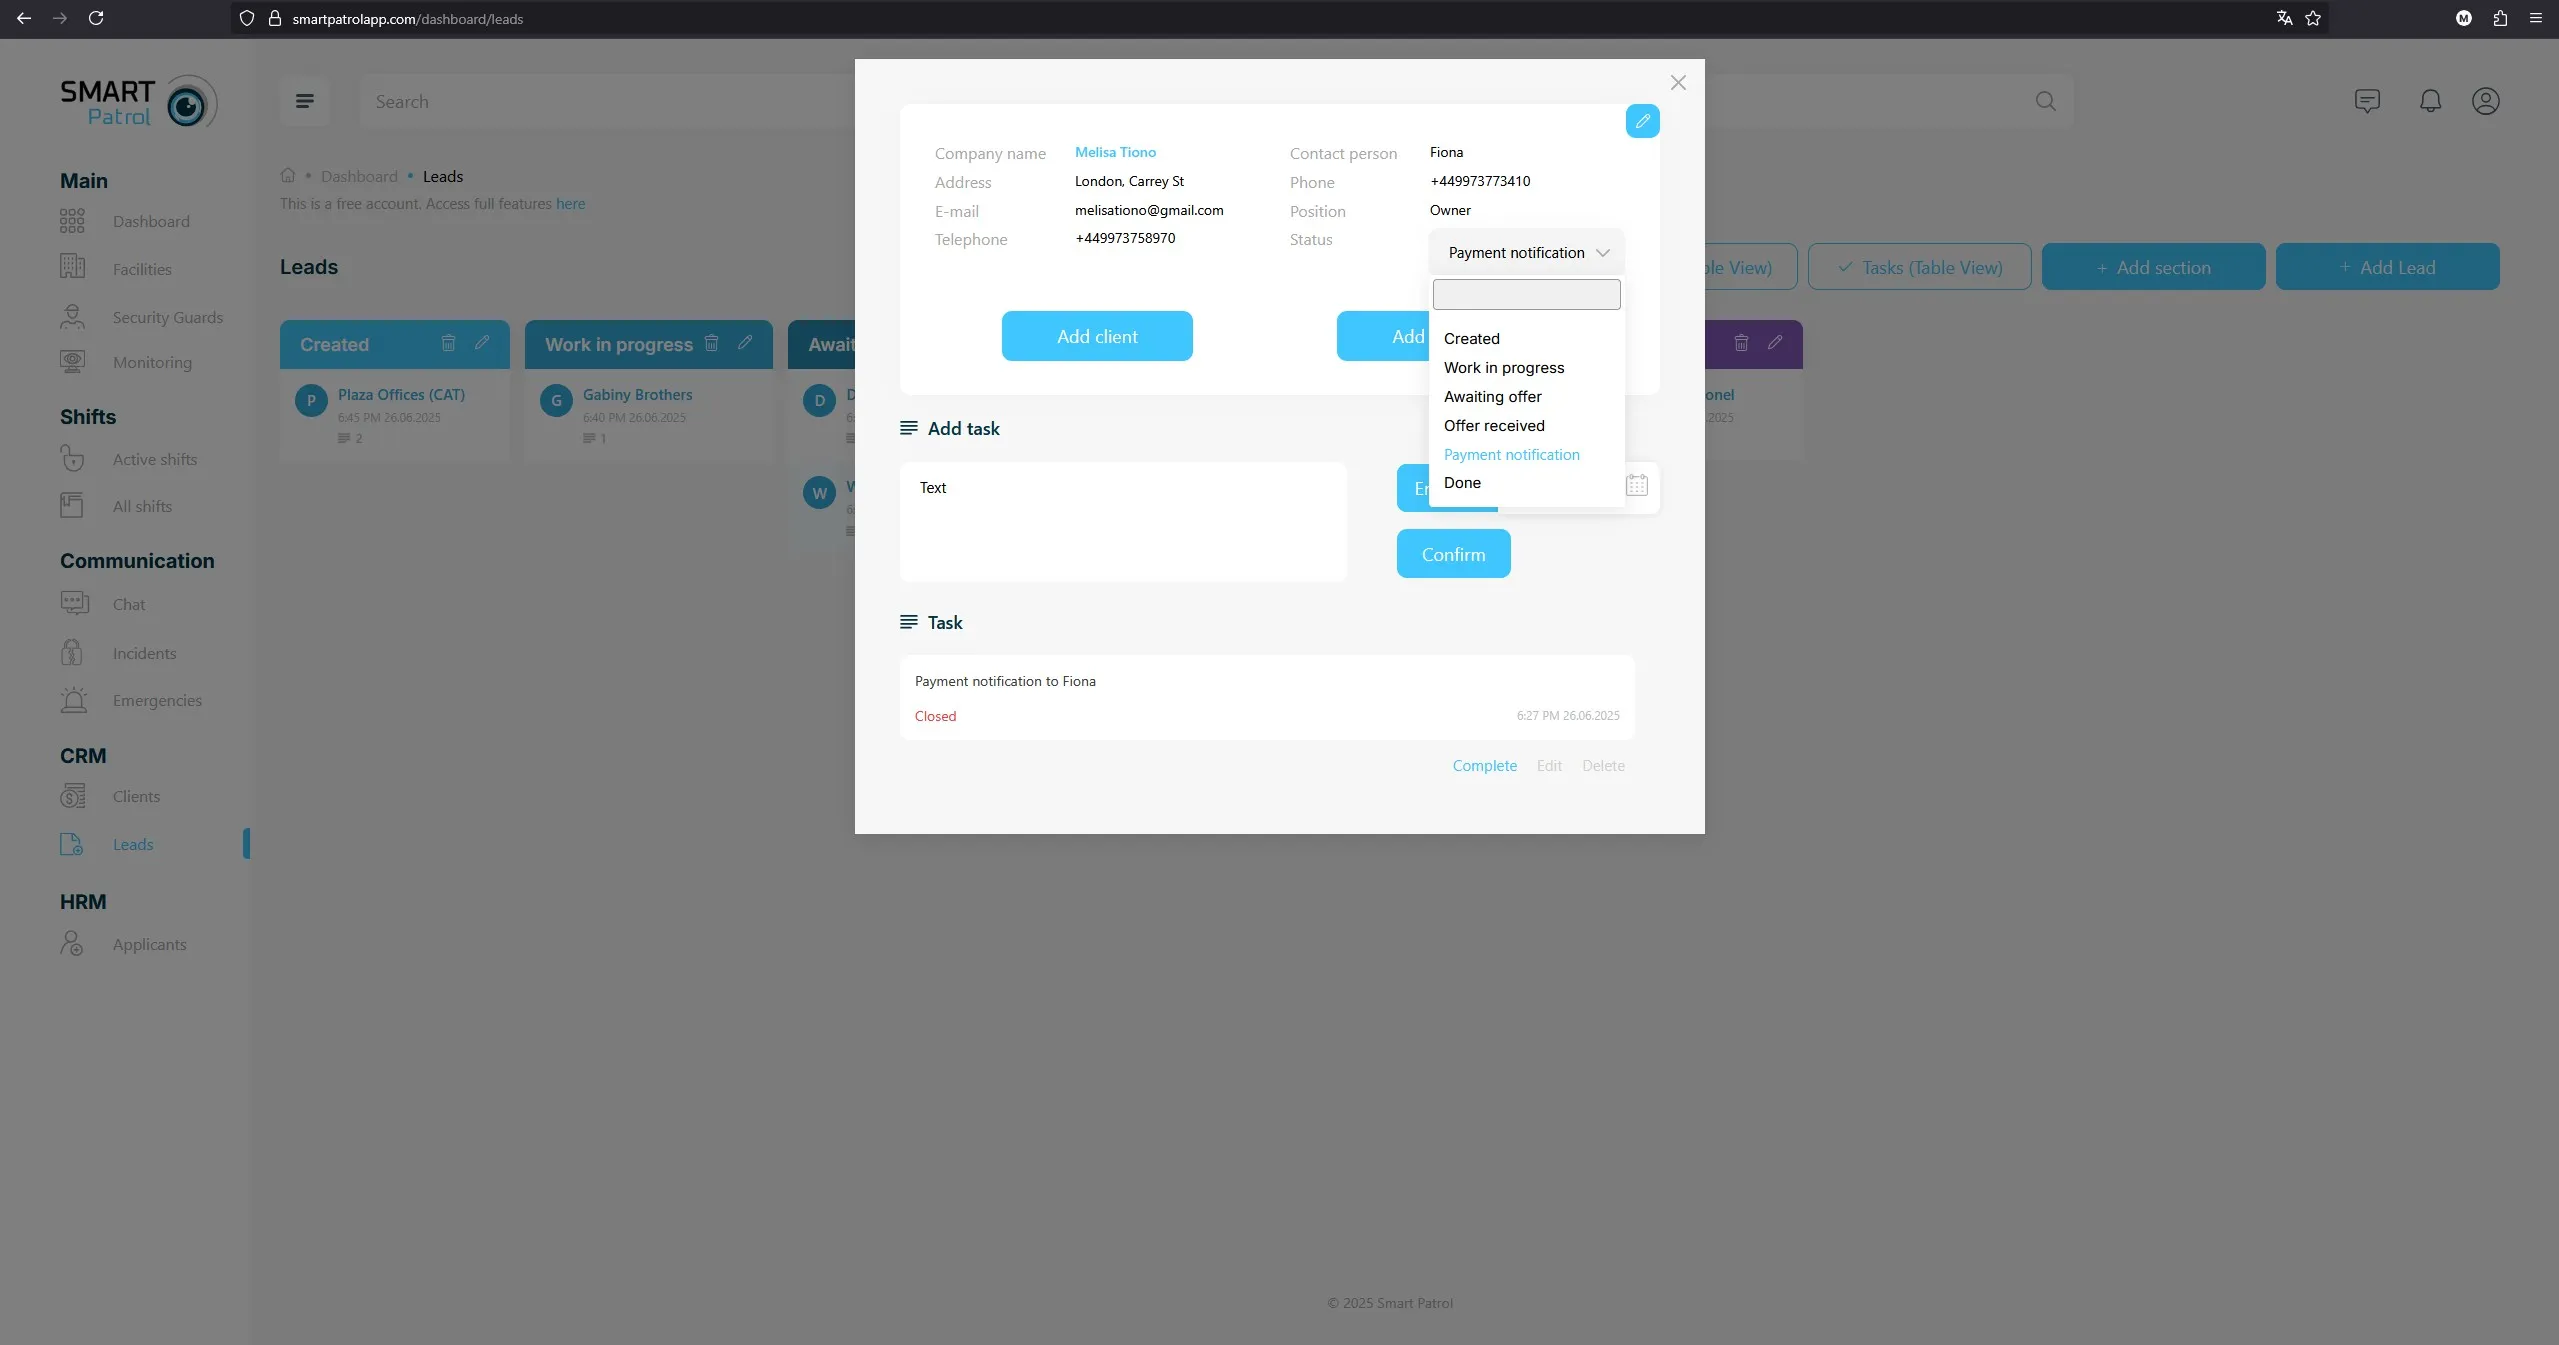
7. Change Lead Status
- To update a lead’s status, use one of these methods:
- Drag and Drop: Click and drag a lead to move it from one status to another.
- Dropdown Menu: Click on the lead to view details, then use the status management option (Image 5).
8. Explore Table Views
- On the "Leads" page, use the following tabs to manage your data efficiently:
-
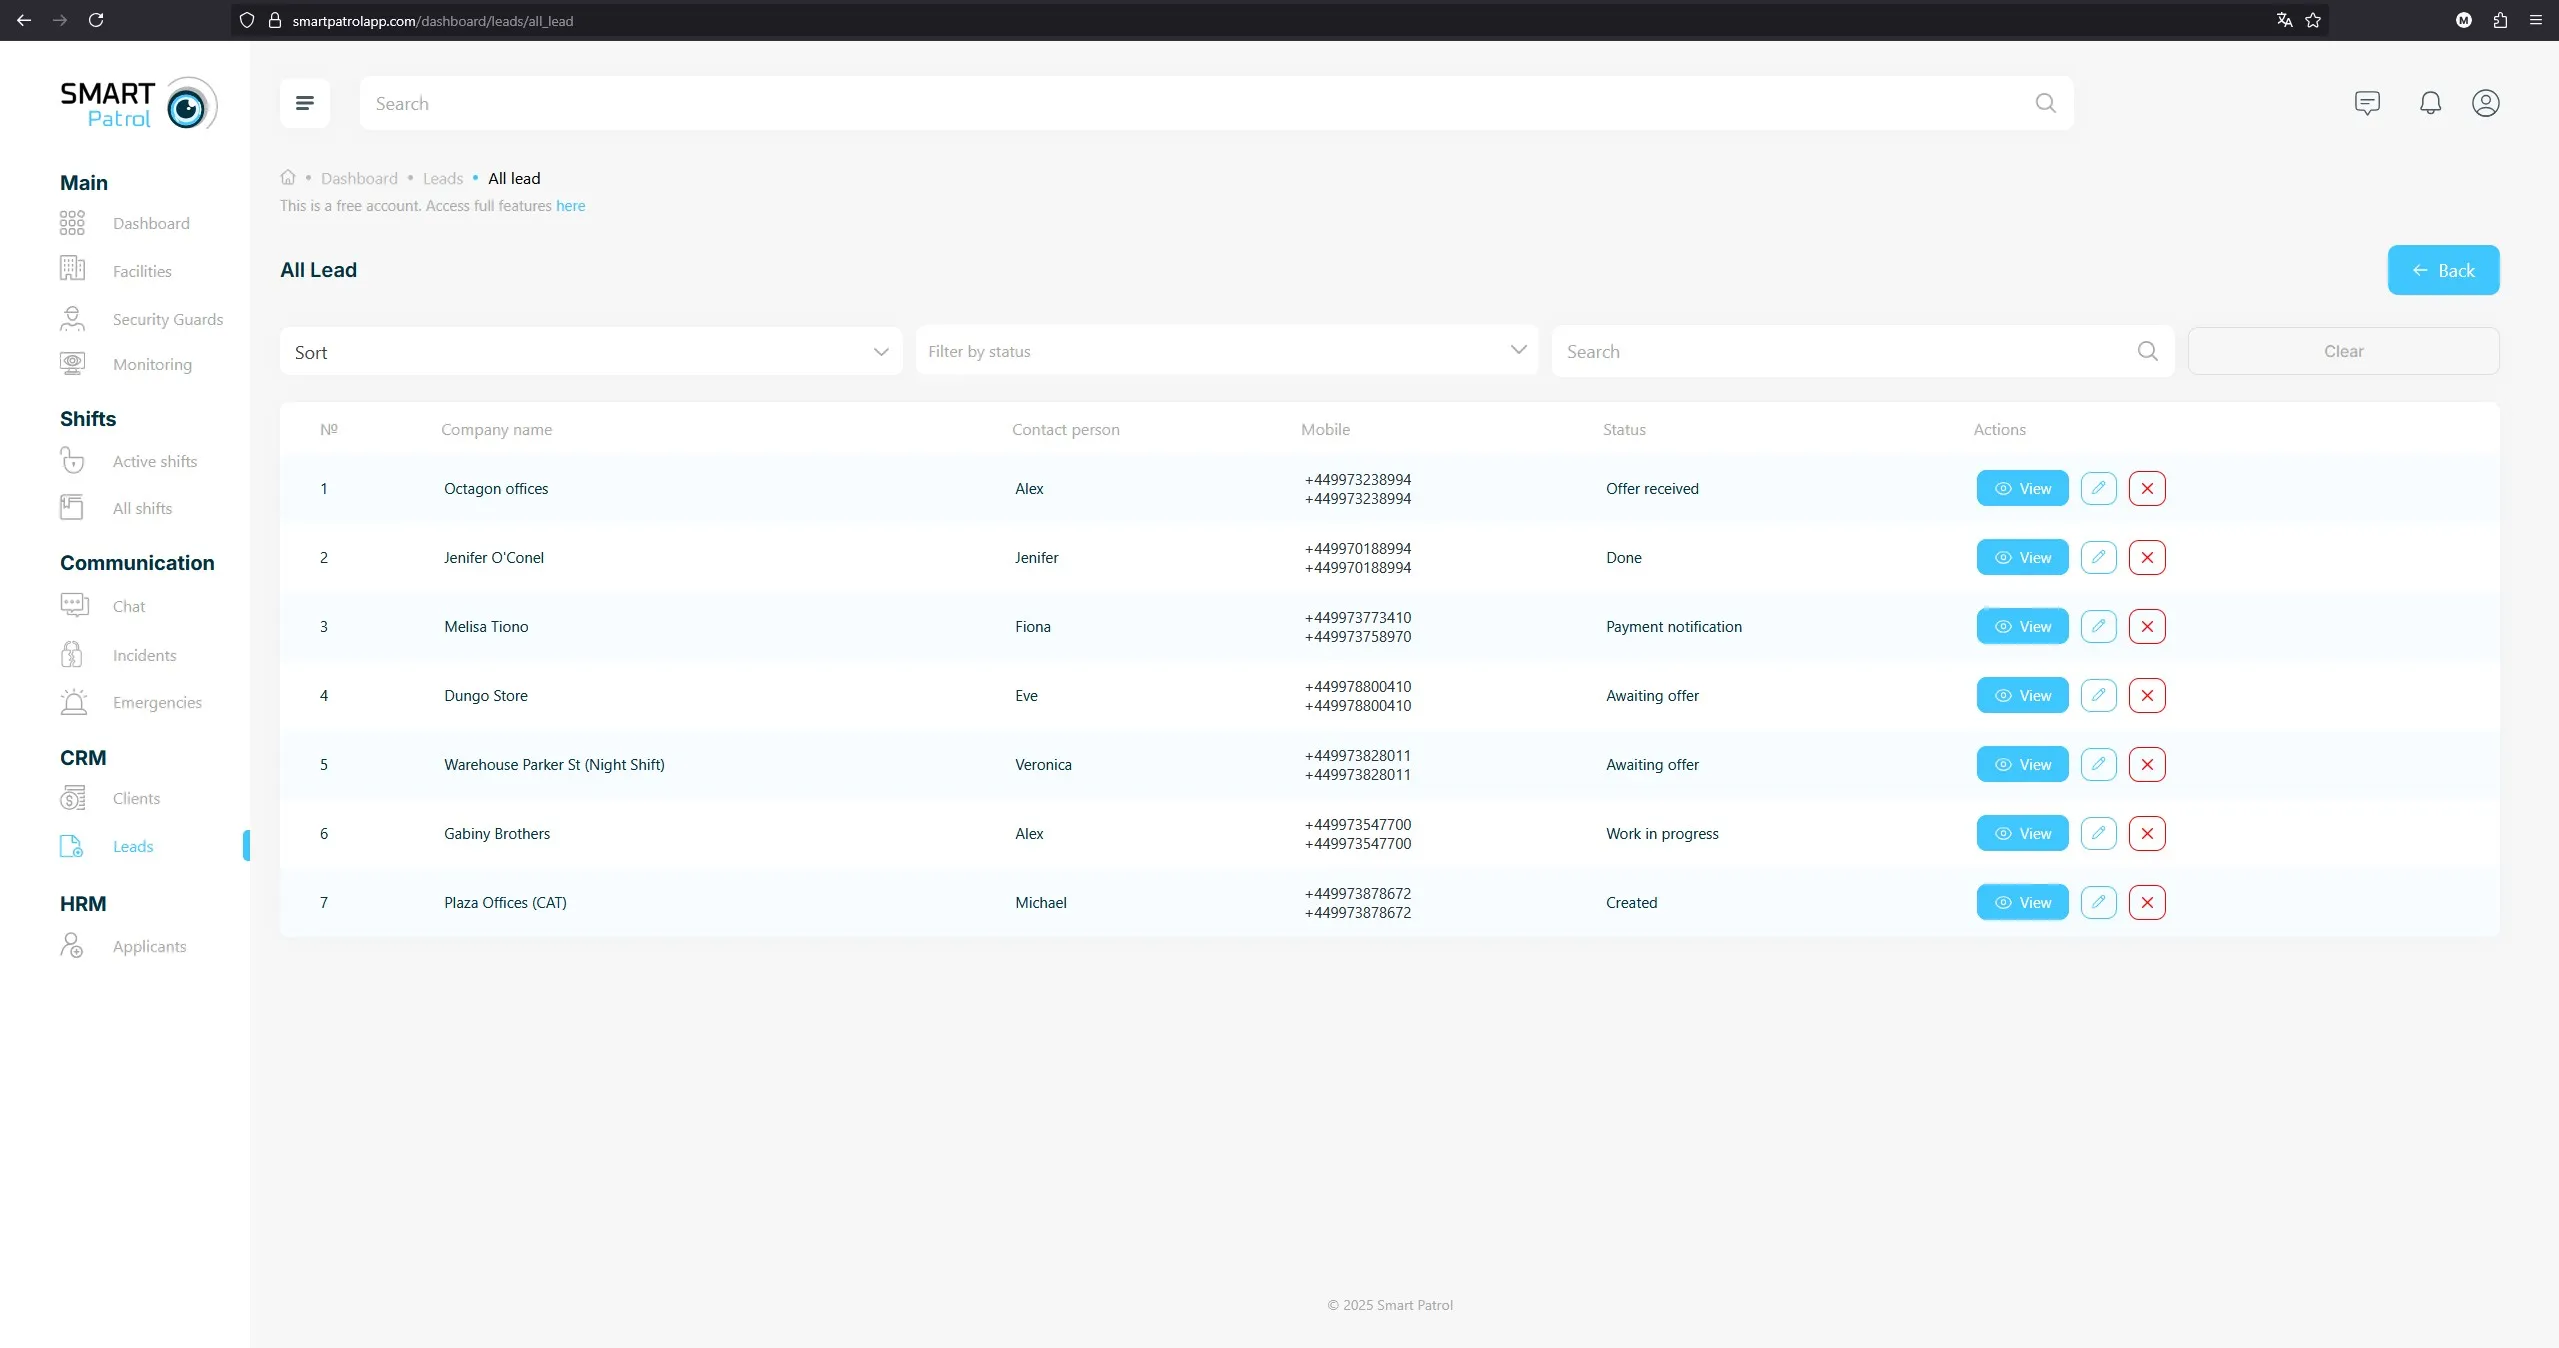
Leads (Table View) (Image 6) - This tab displays a comprehensive list of all leads in a tabular format, showing columns such as Lead ID, Company Name, Contact Name, Status, Phone Number, Email, and Last Updated Date. You can sort and filter the table by any column to quickly find specific leads. To view a lead’s details, click on its row to open the Lead Detail view. To edit a lead, click the "Edit" button next to the lead to update fields like status or contact information. To delete a lead, click the "Delete" button, which prompts a confirmation to ensure no accidental removals. Bulk actions are also available—select multiple leads using checkboxes and choose "Edit" or "Delete" from the top toolbar to process them simultaneously.
-
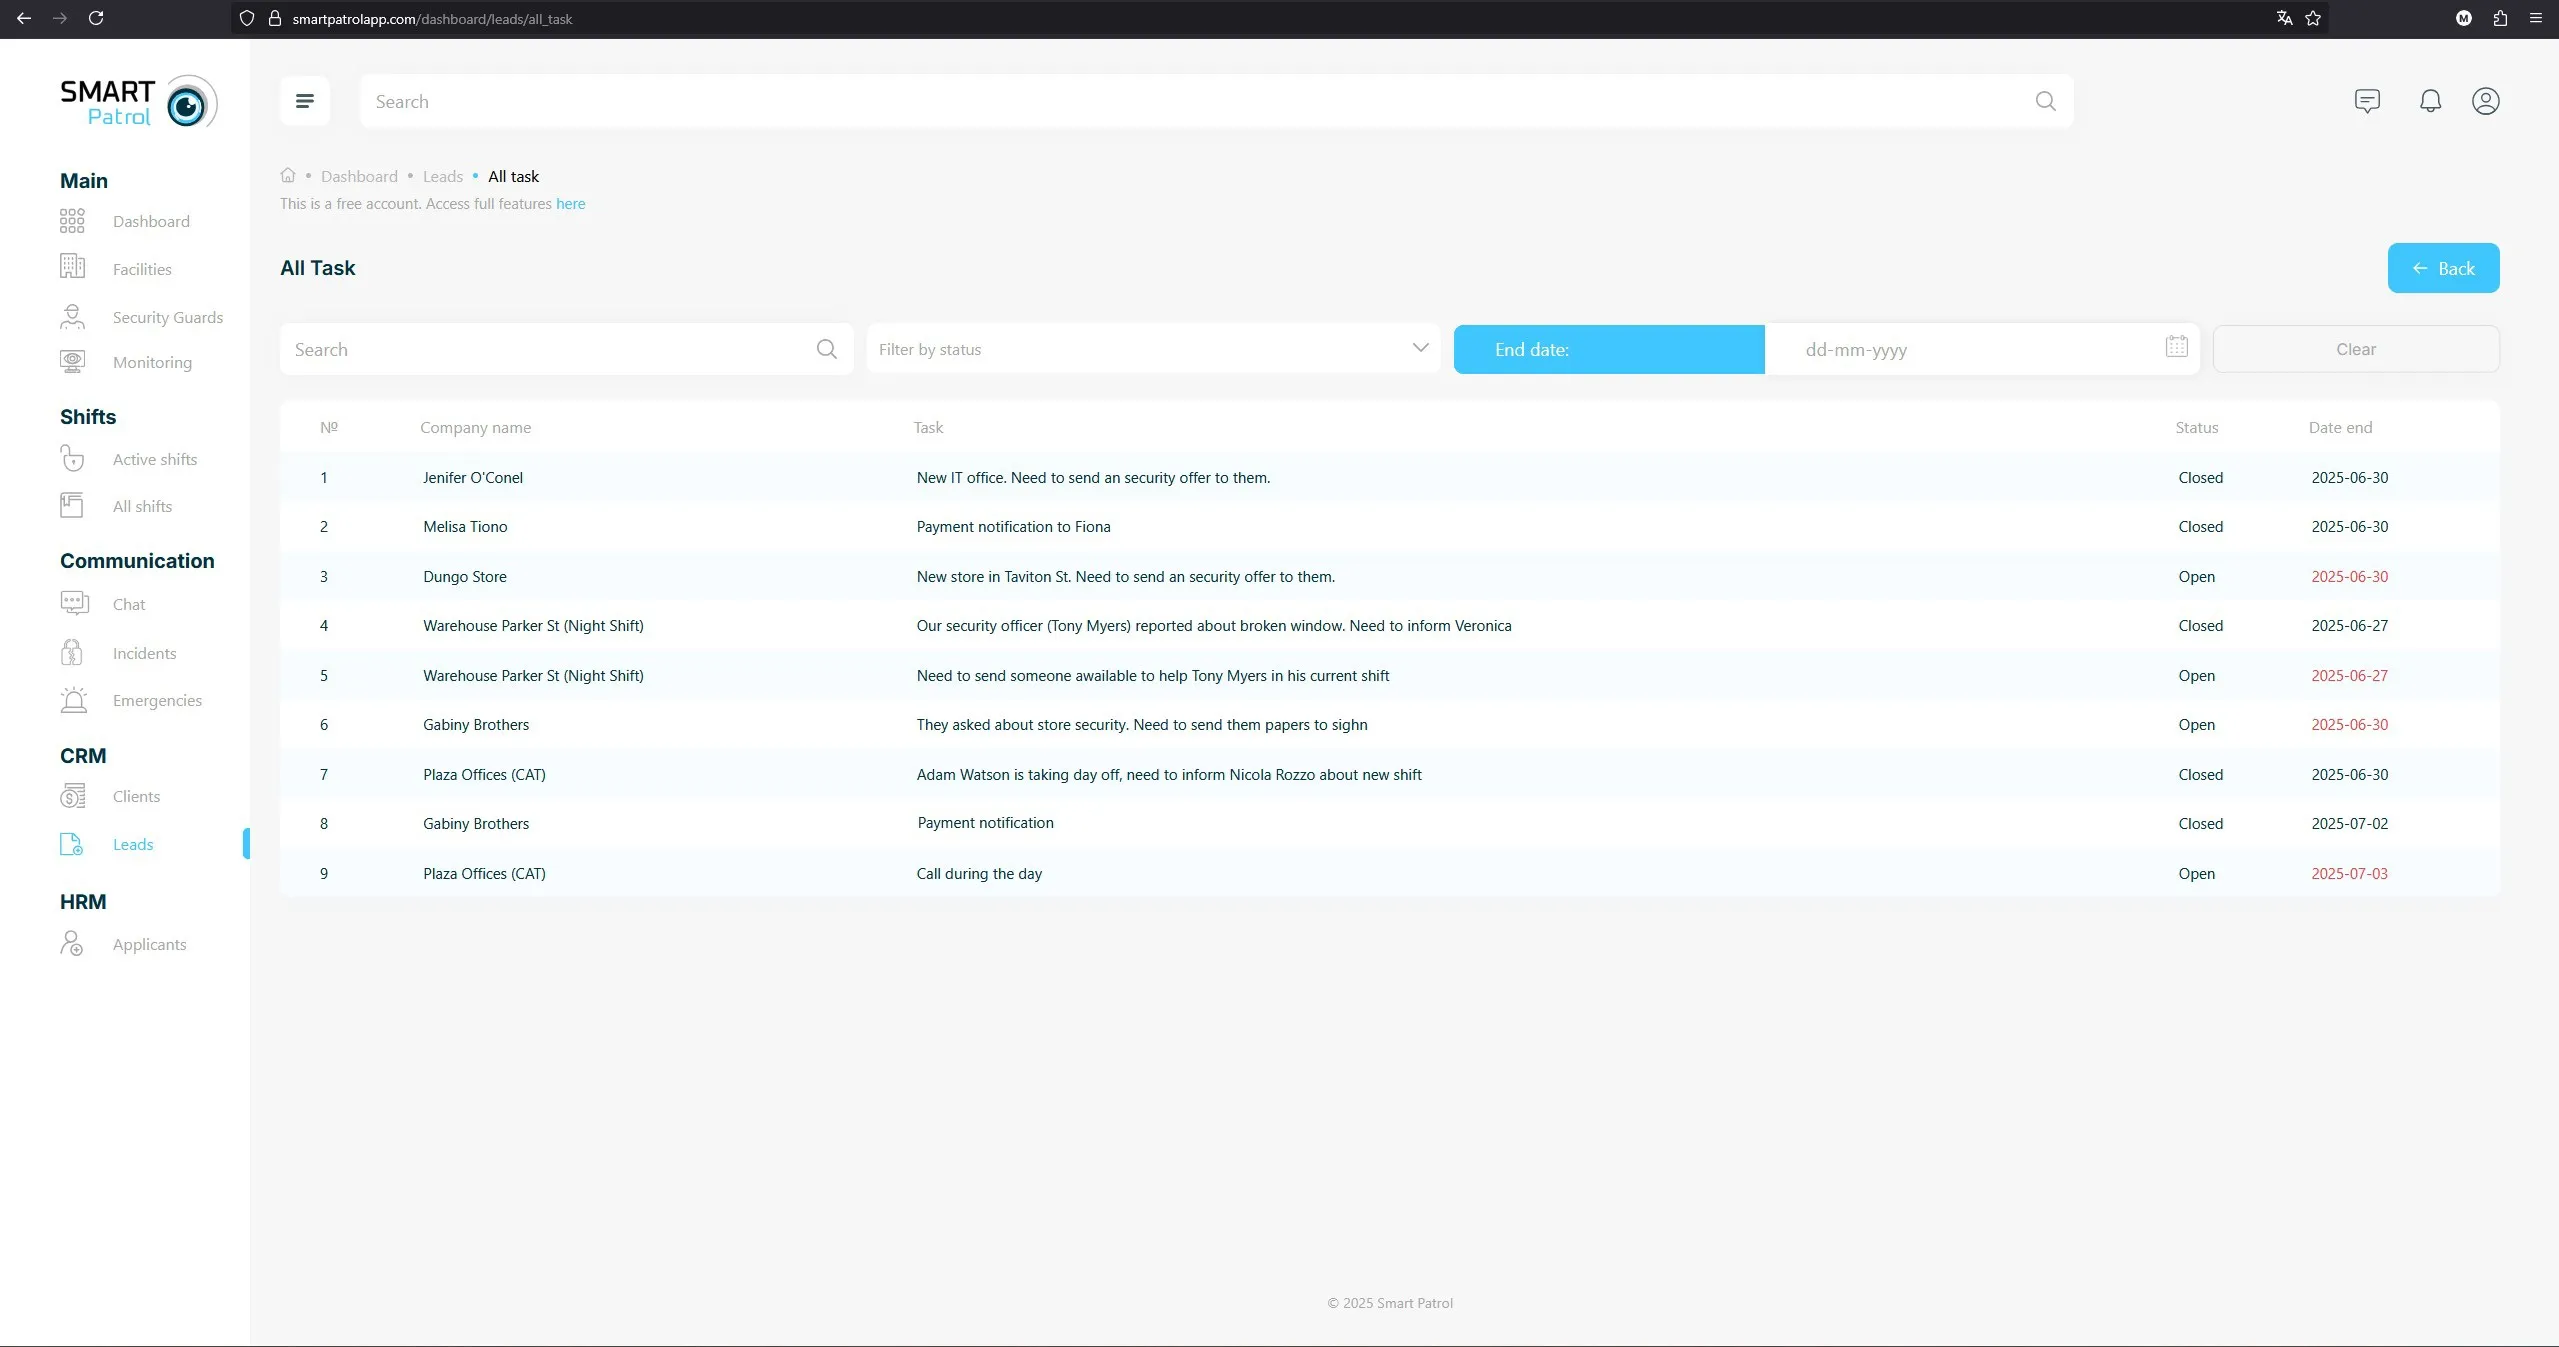
Tasks (Table View) (Image 7) - This tab provides a detailed overview of all tasks associated with leads, presented in a table with columns like Task ID, Lead Name, Task Description, End Date, Status (e.g., Pending, Completed), Assigned To, and Created Date. Sort or filter tasks by any column to prioritize or track overdue items. Click a task row to view its details or edit it directly, including updating the description or End Date. Use the "Complete" button to mark a task as finished, the "Edit" button to modify details, or the "Delete" button to remove it. Tasks with past End Dates are highlighted in red for easy identification. You can also filter tasks by lead or assignee to focus on specific workflows.
Additional Tips:
- Validation: Ensure all required fields are filled when creating a lead or task to avoid errors.
- Permissions: Changing statuses, creating new ones, or deleting tasks may require administrative access—contact support if restricted.
- Efficiency: Use "Table View" tabs for a quick overview and the "End Date" field to track task deadlines.
